An Apple account balance can be used to purchase Apple products and subscriptions. You can also add money to your Apple account balance using your credit/debit card or by redeeming your gift and iTunes cards.
However, there are some cases where you may not be able to use your Apple ID balance as your payment method. In this article, we look at why that is and how to fix it
- Unable to use Apple ID balance as payment method
- Adding a payment method on your iPhone / iPad / Mac
- Adding money to your Apple Account Balance
- Checking your Apple Account balance
- Purchases you can and can't make using Apple ID balance
- Enabling Purchase Sharing for Family Sharing
See also: Why Is Apple Taking Money From My Account?
Unable to use Apple ID balance as payment method
If you’re unable to use your Apple ID balance for payment, you may have an insufficient Apple ID balance to make the purchase, or the item you’re trying to buy can’t be charged against your Apple ID balance. You may also need to add an additional payment method.
For some purchases, you need to have an additional payment method or credit card on file along with your Apple ID balance. Your Apple ID balance will be used for the applicable purchases, but Apple requires you to add a credit/debit card.
Therefore, for some purchases, if you don’t have an additional payment method along with your Apple ID balance, you won’t be able to use your Apple ID balance. Let’s briefly look at how to add a payment method.
Adding a payment method on your iPhone / iPad / Mac
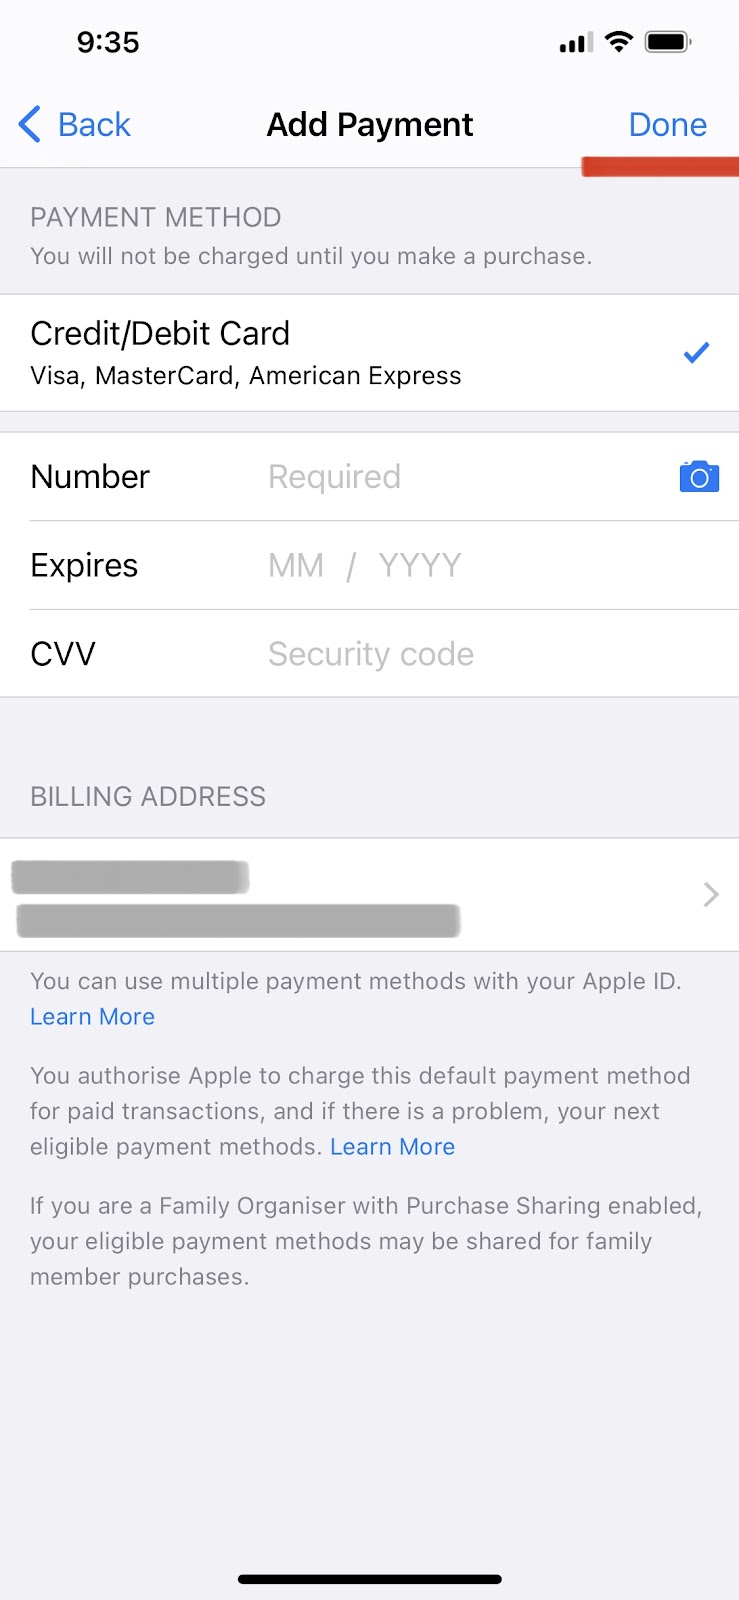
You can add a new payment method on your Apple devices directly from settings. If you’re using an iPhone or an iPad, open the “Settings” app and tap on your name at the top. Tap “Payment & Shipping”.
Log in with your Apple ID credentials and tap “Add Payment Method”, enter your card detail > Done
On a Mac, go to the App Store and click on your name at the bottom > View information. Next to the Payment information option, click “Manage Payments”.
On older Mac versions, click “Edit” beside the Payment Type option.
You may be asked to log in to your Apple ID. Next, click “Add Payment” and enter your card details.

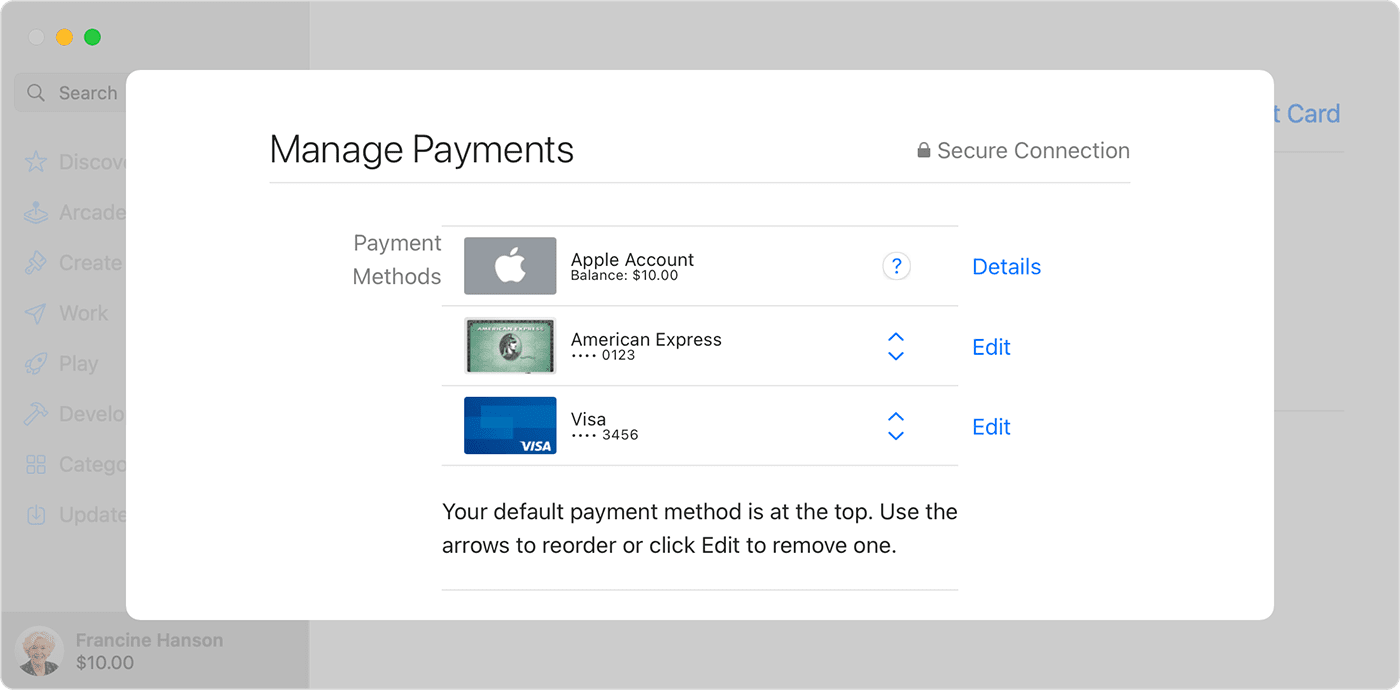
You can change the order of your payment methods by moving the order icon right next to them.
Once you’ve successfully added a payment method, you can add funds to your Apple account balance as explained in the following section.
Adding money to your Apple Account Balance
As explained, you need to add an additional payment method, like a debit/credit card, to add money to your Apple account balance. You can then add money to your balance from your iPhone, iPad, or your Mac.
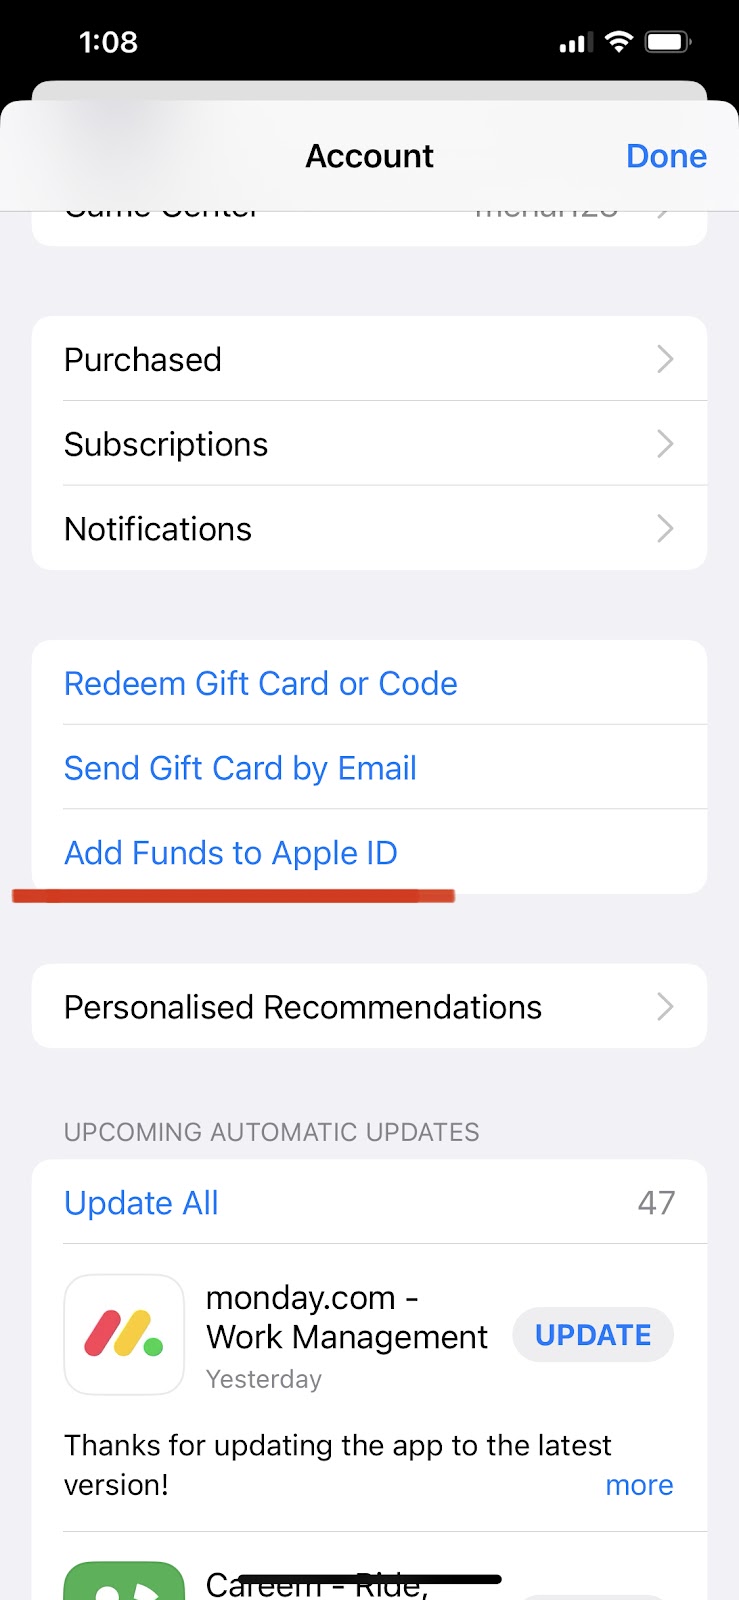
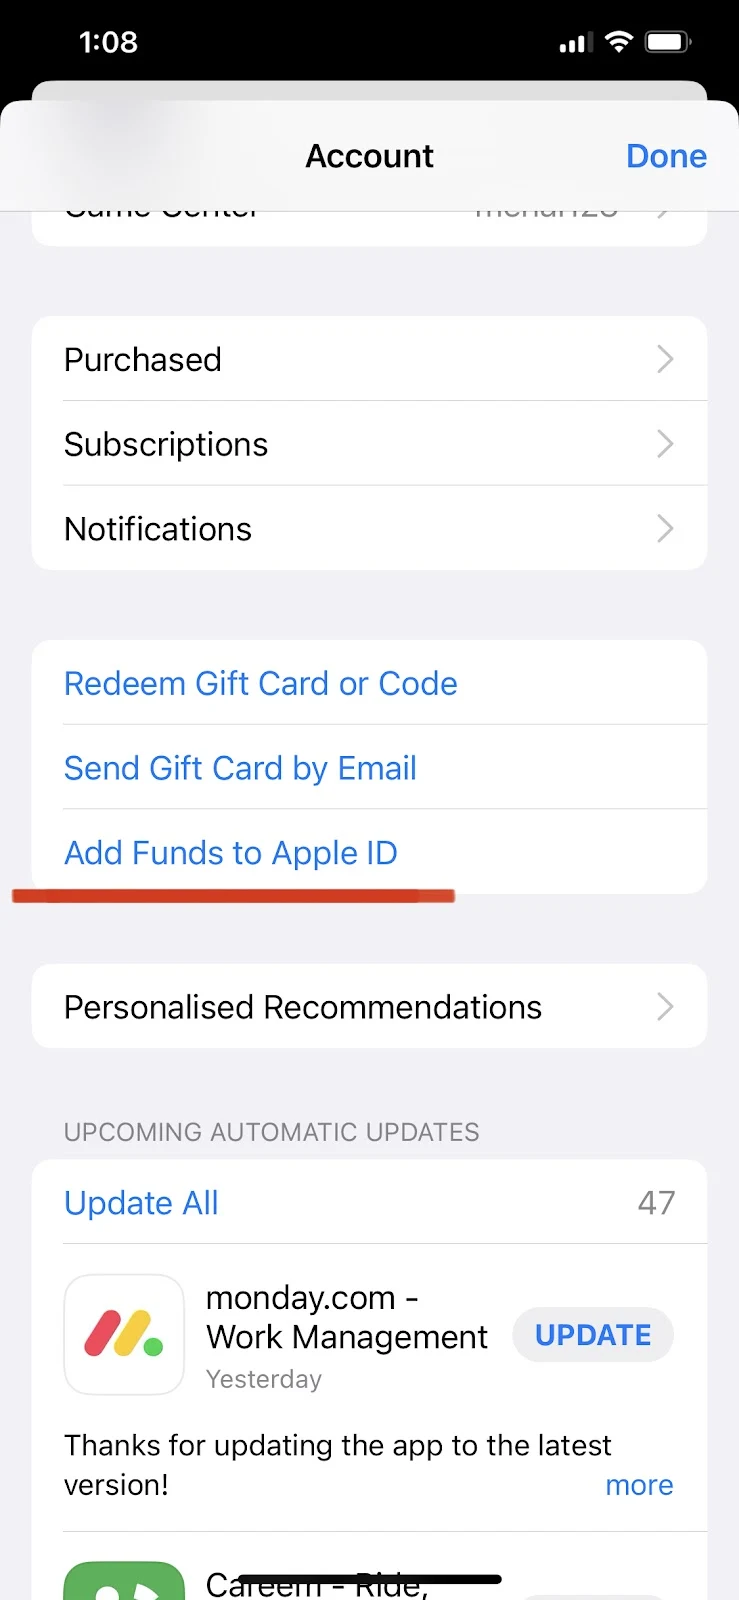
On an iPhone/iPad/iPod Touch, go to the App Store, tap on your profile picture at the top, and select “Add Funds to Apple ID”. Select the amount you want to add and double-click the power button to confirm.
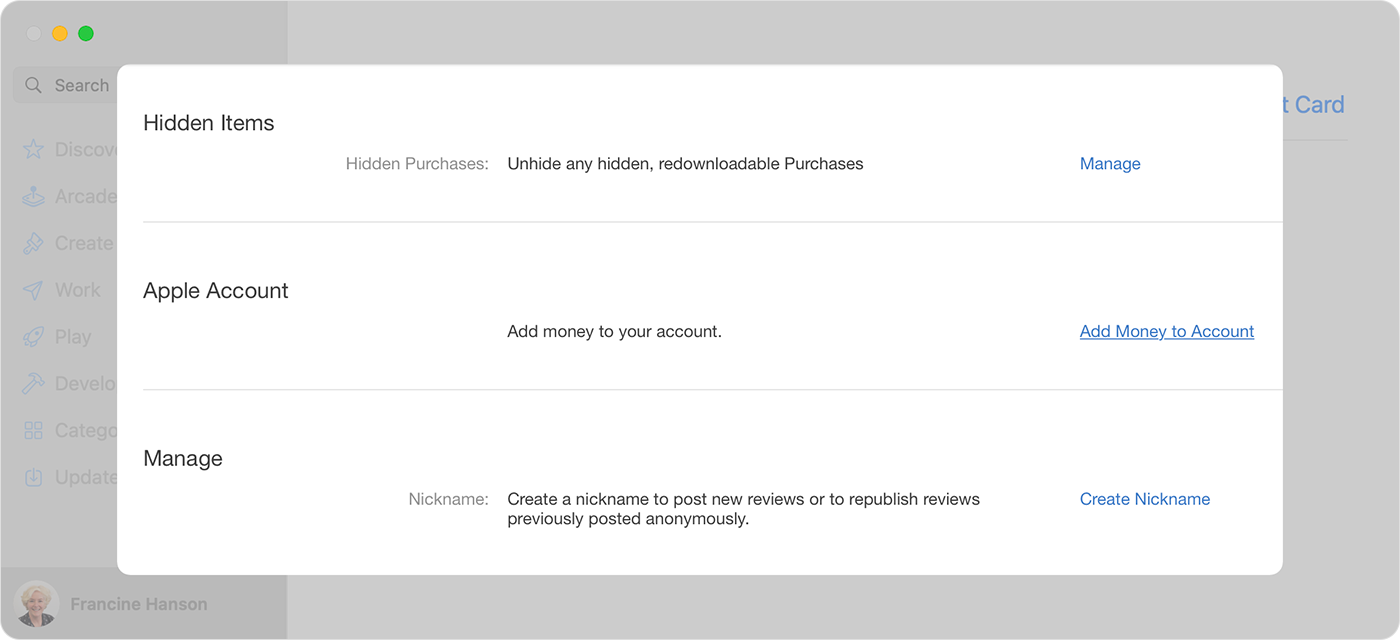
On a Mac, launch the App Store and click your Account name or icon in the sidebar. Next, click on “View Information” from the top of your screen and sign in with your Apple ID credentials.
In the Apple Account, click on “Add Money to Account” and choose the amount of money you want to add to your Apple ID balance. Click Next and re-enter your Apple ID password to confirm.

An alternative to manually adding adding money to your Apple ID balance every time is to set up auto-reload.
Set up auto-reload for Apple Account Balance
Launch the App Store on your iPhone, tap your Account picture at the top right corner, and select “Add Funds to Apple ID”. Choose “Auto Reload” and set the amount (up to $200) and minimum balance in the “Low Balance” section.
The amount that you enter will be automatically added to your Apple account balance every time your Apple Account balance falls below the specified minimum balance.
An alternative to using the “Low Balance” setting is to use the Schedule feature, to schedule the amount you want to add to your Apple account balance on a weekly, bi-weekly, or monthly basis, regardless of minimum balance.
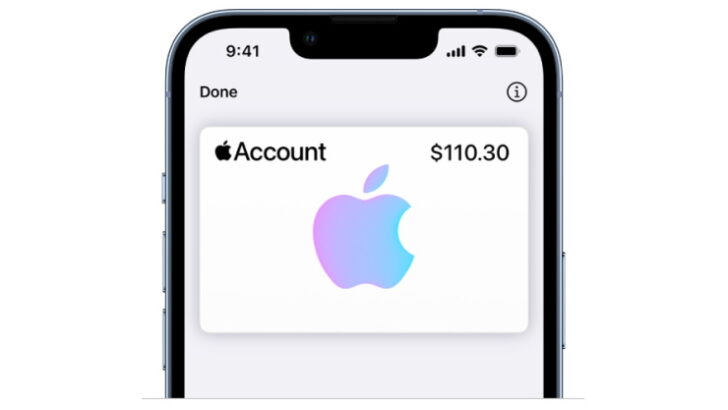
Checking your Apple Account balance
Whether you’re using an iPhone/iPad or a Mac, you can check your Apple Account balance from the App Store app.
On iPhone/iPad, open the App Store and tap your profile picture. This may require you to sign in with your Apple ID.
After signing in, you’ll be able to see your Apple account balance right away. If the balance doesn’t appear, it normally means you have no Apple account balance.
On a MacBook, open the “App Store”, and your balance will appear at the bottom of the sidebar under your Account name and profile picture.
See also: Does Changing Your Apple ID Password Delete Anything?
Purchases you can and can’t make using Apple ID balance
You may notice that your credit/debit card gets charged instead of your Apple ID balance even though you have enough funds in your Apple ID balance.
This is because there are only a limited number of things you can purchase using your Apple ID balance:
- You can buy any Apple products and accessories, like iPad, iPhone, and Mac, from apple.com using your Apple ID balance
- Apple ID balance can be used to buy apps and games from Apple’s App Store
- You can pay for your subscriptions like Apple Music, Apple TV+, and more
- You can also purchase movies, music, podcasts, and books from Apple TV+, Apple Music, Apple Books, etc
- iCloud+ storage can also be bought using Apple ID balance
Therefore, some purchases can’t be made using your Apple ID balance as your payment method. For example, you can’t use your Apple ID balance for sending gifts or gift cards.
Also, if you have a Family Sharing account, your family members can’t use your Apple ID balance for purchases. Only you (the organizer/owner) can.
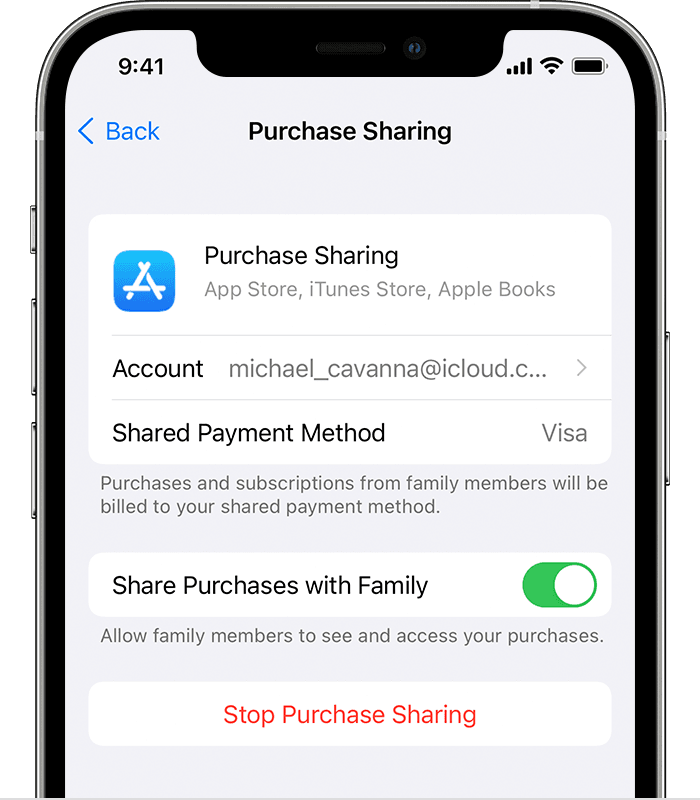
Enabling Purchase Sharing for Family Sharing
in a family-sharing account, you can enable your family members to make purchases using your preferred payment method. Remember though, the payment method can’t be an Apple account balance.
If you are the organizer of a family-sharing account, you can let your family members make purchases using your credit/debit card by enabling the “Purchase Sharing” feature.
The purchases will be shared among all the family members in the family-sharing Account.
To enable Purchase Sharing, go to Settings > tap your name at the top > Family Sharing > Purchase Sharing >”Continue” and follow the instructions.
To check which payment method will be billed, tap “Purchase Sharing” again and check the payment method in the “Shared Payment Method” section.