


You can use Apple Mail rules to manage your incoming emails automatically once they arrive in your inbox. However, you may find your rules are not being enforced on your incoming mail, or only when you apply them manually.
- Apple Mail Rules not working
- What are Apple Mail rules & what are they used for?
- Apple Mail rules not working Automatically on Mac
- Filtering unwanted messages and send them to Junk or a Particular Folder using Apple Mail rules
Apple Mail Rules not working
Your Apple Mail rules may not work if your emails have already been read on another device, you have “Stop evaluating rules” or “Stop processing more rules” enabled in a rule, or your mailbox has some file issues.
Before we dive into why your Apple Mail rules are not working and possible fixes. let’s look at what Apple Mail rules are, what they are useful for, and how to set them up.
What are Apple Mail rules & what are they used for?
Apple mail rules are user-defined rules for managing incoming emails automatically. Being user-defined means that you have the authority to manage your emails the way you want. Apple does not define these rules.
With the help of Apple mail rules, you can automate your email management to eliminate repetitive tasks like transferring emails from a specific username to a particular folder.
For example, let’s say that you need to send every incoming mail from the email address “music@apple.com” to a specific folder or mailbox named “Apple Music”.
Without Apple mail rules, you will need to manually select all the emails when they arrive and transfer them to the desired folder.
Instead, you can create a rule that automatically sends incoming emails from “music@apple.com” to the “Apple Music” mail folder.
Doing this will not only save you time, it will also clear all the emails from your inbox and transfer them to your desired folder.
You can also specify conditions and actions for your incoming emails. For example, using mail rules you can automatically mark as read all incoming emails from “music@apple.com”.
Now that we understand what Apple mail rules are, let’s take a look at how we can create them.
How to create an Apple Mail Rule on a Mac
You can easily create Apple mail rules in your Mac’s Mail app. Note that rules created on your Mac will only be applied to the emails you receive on your Mac, not across your other Apple devices.
Instead, you can create mail rules on iCloud.com so that your Apple Mail rules will be applied across multiple Apple devices.
The iCloud mail rules will be applied to all your Apple devices.. However, be aware it will only work with iCloud mail, not with any other mail providers like Gmail, Yahoo, etc.
Another thing to note is that there are fewer Apple Mail rules features when using iCloud.com compared to Apple Mail on a device.
We’ll get to this in a bit but first, let’s look at the steps for creating rules on a Mac – again, rules will only be applied to your Mac:
First Launch the “Mail” app on your Mac and click on Preferences > Rules to add a rule for your emails. Click on the “Add Rule” button on the right and name your rule.
Next, specify the conditions for your rule. For example, if you want to move messages from a particular email address, you must provide that sender’s email address. You can click the “+” button to add multiple conditions.
Choose whether you want to apply “All” or “Any” of the specified conditions. You will see this option under your rule name.
After specifying conditions, now is the time to select actions to perform on emails. For example, you can select the action “Move” to mailbox “Trash”. Click the “+” button to add multiple actions.
Finally, click on “Ok” > “Apply” to confirm your created rule.
This was all about creating a rule on a Mac. Next, we’ll see how to create a rule on iCloud.com so that rule can be applied across multiple Apple devices.
How to Create a Rule on iCloud.com?
The rules you create on iCloud.com applies to your iCloud email across your Apple devices.
Here’s how you can do it:
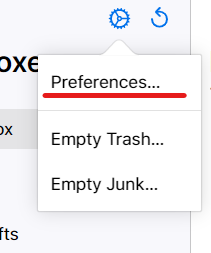
Visit iCloud.com using your browser and enter your Apple ID and password to sign in. Next, click on “Mail” and open “Preferences” by clicking the settings gear icon at the top left (above Mailboxes).
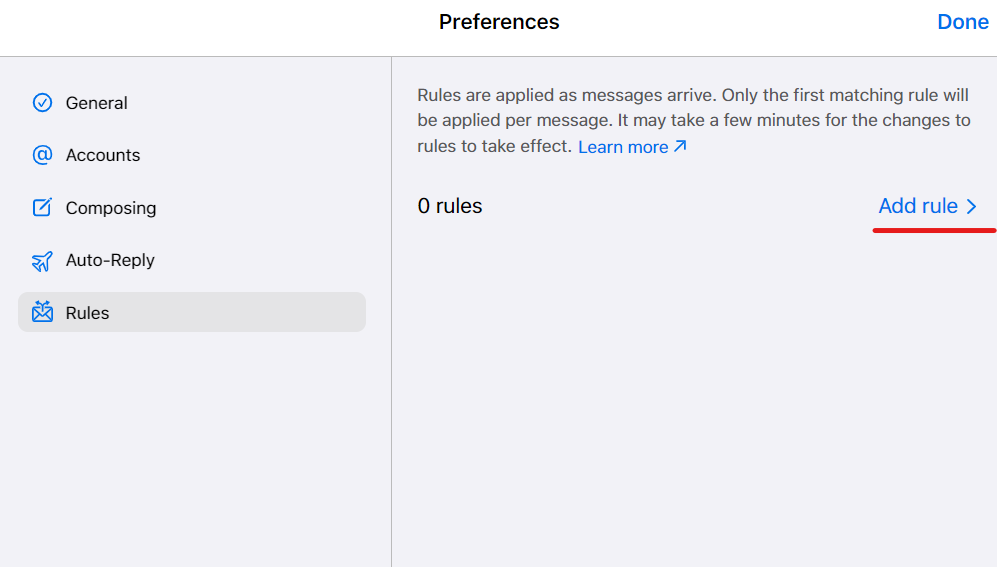
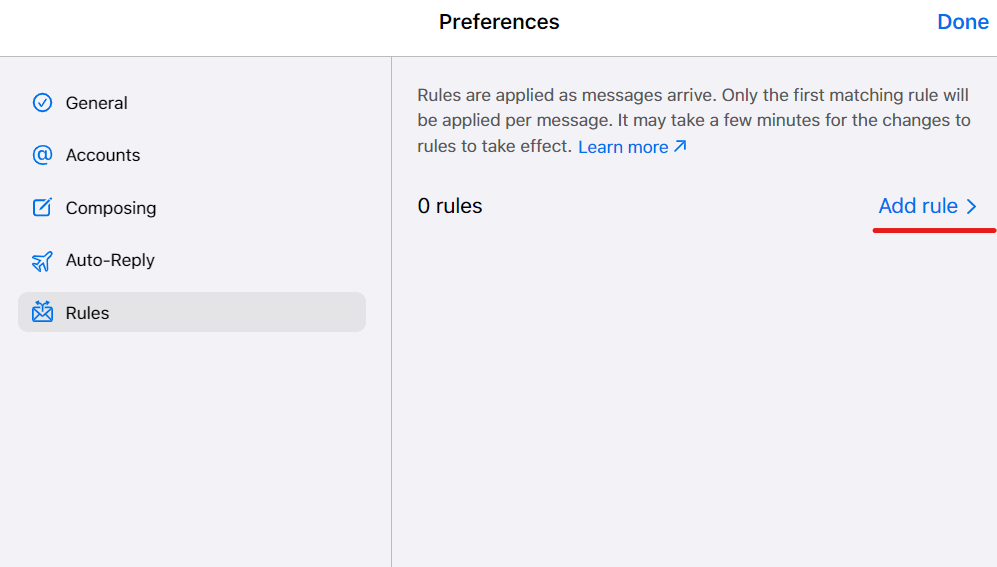
In “Preferences”, choose the “Rules” option and click on “Add rule” to create a rule for your iCloud emails.
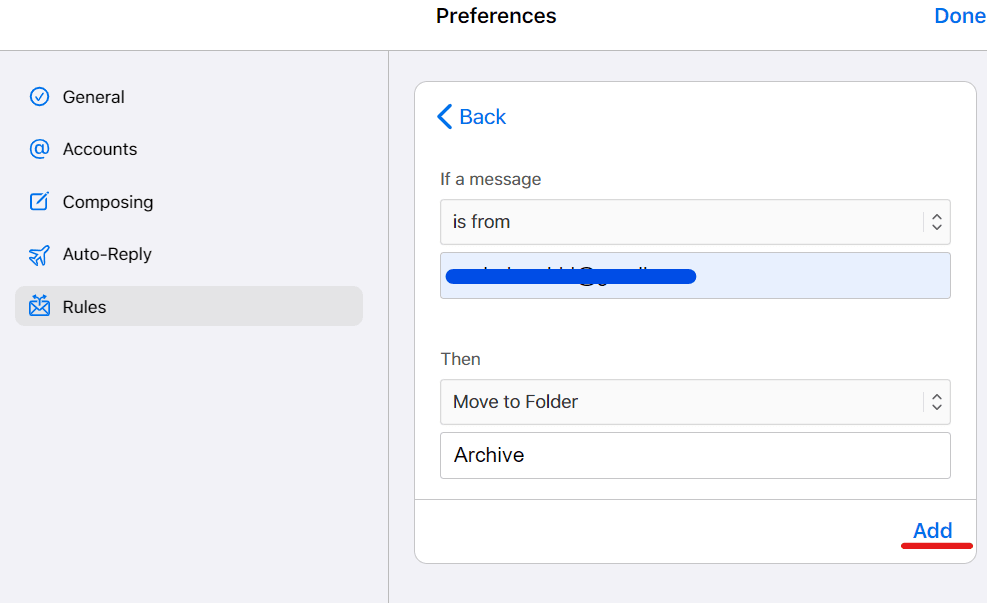
Select the conditions and actions as explained in the above section, and click on “Add” to successfully implement the rule.


We have now seen how mail rules are created and used. But what if your mail rules are not working or only working manually after you have created them on your Mac?
Apple Mail rules not working Automatically on Mac
Firstly, you should know that Apple Mail rules only work automatically for incoming email messages.
So if you set a rule for receiving a message from a particular email address, the rule will be applied automatically when that email comes into your inbox.
You should not expect rules to work automatically for emails that are already in your mailboxes. However, you can apply rules to existing messages manually by selecting them.
Nevertheless, in some cases your rules may not be applied automatically for incoming emails on your Mac. The following are some possible causes and solutions:
Email read on another device
Apple mail rules only work for unread emails.
When you open your Mac or the mail app on Mac, the emails start downloading from the server, and if the server finds out that you have read an email before on another device, it will pass that email on to your Mail app on Mac as “read” and your Mail rule will not be applied.
For example, suppose you have an email account “example@hotmail.com” logged in to your iPhone as well as on your Mac.
Now, if you are using your iPhone and you open an incoming email on your iPhone, the Apple mail rule will not be applied to that email on your Mac.
So make sure not to read emails you want to apply rules to on your other devices.
“Stop Processing More Rules” or “Stop Evaluating Rules” action is enabled
If the “stop Processing More Rules” or “Stop Evaluating Rules” action is added to any of your rules, the rest of the rules may not work.
If that’s keeping your Apple Mail rules from being applied, here’s how to fix it:
First open the Mail app on your Mac and select “Preferences” > Rules. You will see a list of rules that you have on your device.
From there, click on the default rule “News from Apple” and see if there is an action called “Stop Evaluating Rules”. Delete this action if present.
If this doesn’t solve your issue or the “Stop Evaluating Rules” action is not present in the “News from Apple” rule, check all the other rules that you’ve created and look for the “Stop Processing More Rules” action.
If this action is present, delete it.. Your rules should now work fine.
Mailbox issues
If you tried the above approaches but the rules still don’t seem to work, the mailbox to which your emails are directed might be causing the problem.
You can try to rebuild your mailbox in the Mail app to solve the issue and have your rules working again.
This is also a good approach if your Apple mail rules are neither working automatically nor manually.
Note that rebuilding the mailbox deletes your messages from the mailbox and downloads them again from the server automatically. Therefore, this approach should chosen if you have an IMAP account so that emails can be downloaded from the server.
Since POP typically does not keep emails on the server after downloading them on a device, you should not rebuild a mailbox if you use a POP account.
To rebuild your mailbox, launch the Mail app on your Mac and in the sidebar, select the mailbox that your emails are directed to in your non-functional Apple Mail rule, then click “Rebuild”.
Once you have Apple Mail rules automatically working again, you can use them for many purposes, including filtering out certain words or processing junk emails. Let’s look at some examples.
Filtering unwanted messages and send them to Junk or a Particular Folder using Apple Mail rules
You can turn on junk mail filtering in your Mail app to get rid of junk emails appearing in your inbox. Follow these steps:
Open Mail > Preferences > “Junk Mail” and check the box “Enable Junk Mail Filtering”. In the same window, you can set your Junk Mail preferences as preferred.
If you want to add custom settings for detecting Junk emails, select “Perform custom actions” from the “Junk Mail” tab and click “Advanced”.
You can also set your own Apple Mail rule for emails containing inappropriate words:
Let’s say you want to filter out a message that contains a certain word. Open Mail > Preferences > Rules > Add Rule. Under “Conditions”, select “Any Recipient” & “Contains” and enter the excluded word (eg.”Porn”) in the text box.
Next, set the rule action by selecting “Move To” to a mailbox, e.g. “Junk”. Click “Ok” > “Apply” to move all the incoming new messages containing the word “Porn” to the specified folder.