


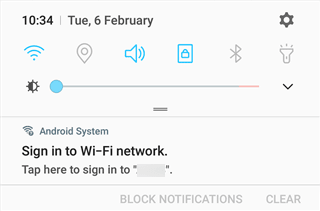
When you connect to your WiFi network, your Android device may ask you to “Sign-in to the WiFi network”. Sometimes, however, this message will keep showing up again and again. What is happening? How to fix this issue?
Your Android may keep asking you to sign in to the WiFi network if there is an issue with the router and it needs to be restarted, if your network SSID or PSK has changed, or if you are trying to connect to a session-based public WiFi network.

The SSID (Service Set Identifier) is the name of your WiFi network that you see when you turn on your WiFi. The PSK (Pre-Shared Key) is simply the password of your WiFi.
- How do I stop "Sign in for network" notifications?
- How do I get my Android to automatically connect to WiFi?
- How do you reset network settings on Android?
- How do I change APN settings on Android?
- How do I find my WiFi IP address on my Android?
- How do I change my network password on Android?
- Why is my Android phone connected to WiFi but no internet?
How do I stop “Sign in for network” notifications?
If your device pops up the ‘Sign in for network’ notification repeatedly, there are several possible reasons including:
- Problems with your network router
- Connection to a session-based public network
- Change of SSID or PSK for your network.
To solve the issue, try one of the following approaches:
1. Restart or reconnect the network router
A network router may stop working properly if there is a server issue at your internet provider’s end. This can cause the router to generate network errors. One of these errors is forcing your device to log in to the network repeatedly.
The issue can often be solved by simply rebooting your router:
- Unplug the power supply to your network router
- If it’s a wired router, disconnect the ethernet cable
- Wait for a couple minutes then plug the router back in
- Turn on WiFi on your mobile device and try reconnecting to your network
Your device should stop asking for sign-in repeatedly.
2. Forget and reconnect the WiFi network
‘Sign-in to network’ notifications can be caused by changed SSID on your internet router. Organizations sometimes change the SSID of their network during maintenance. Similarly, you might have to change the password of your Wifi network for security reasons.
You can try “forgetting” then reconnecting to the WiFi network as follows:
- On your phone, pull down the quick settings
- Press and hold the WiFi icon
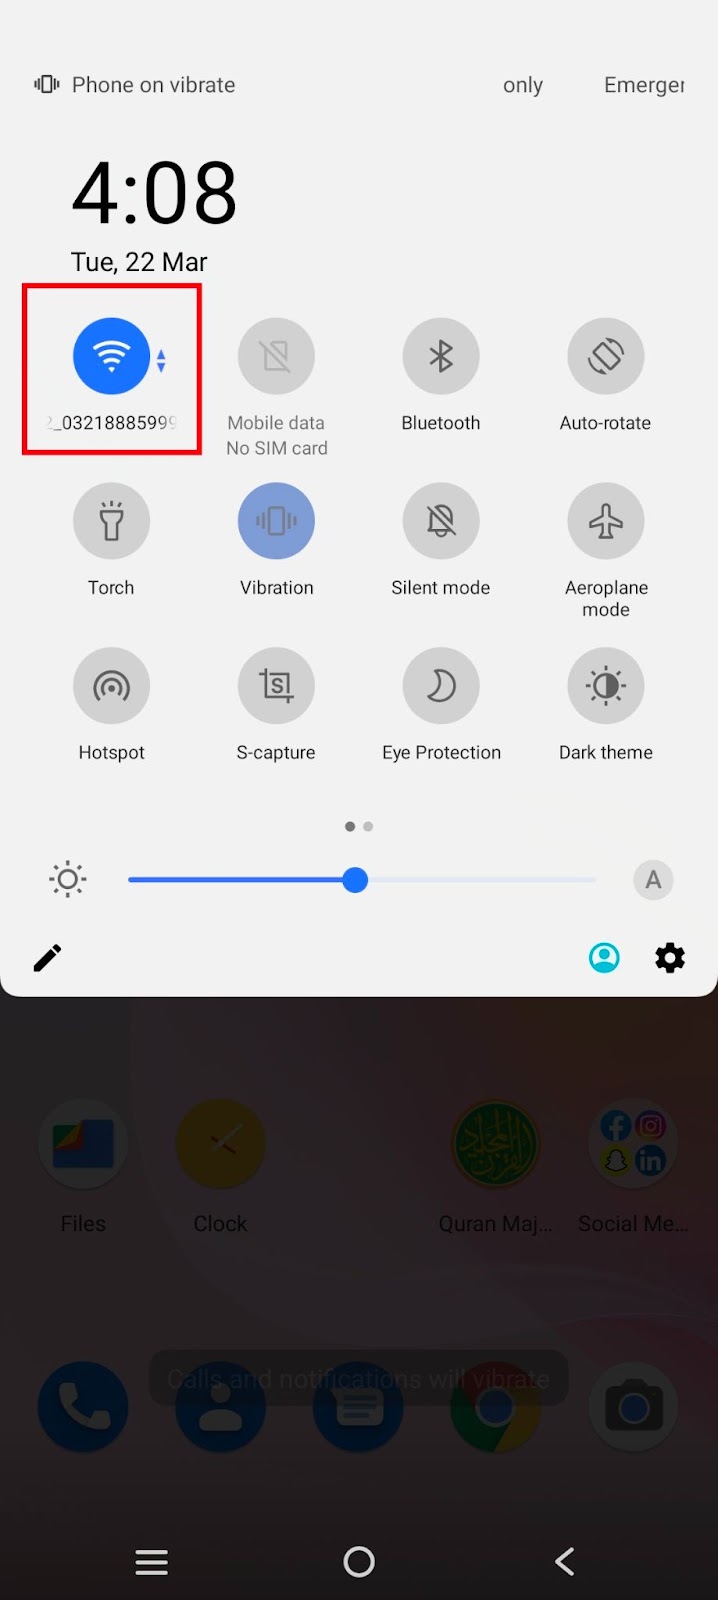

- Tap the gear icon next to the network your device is connected to
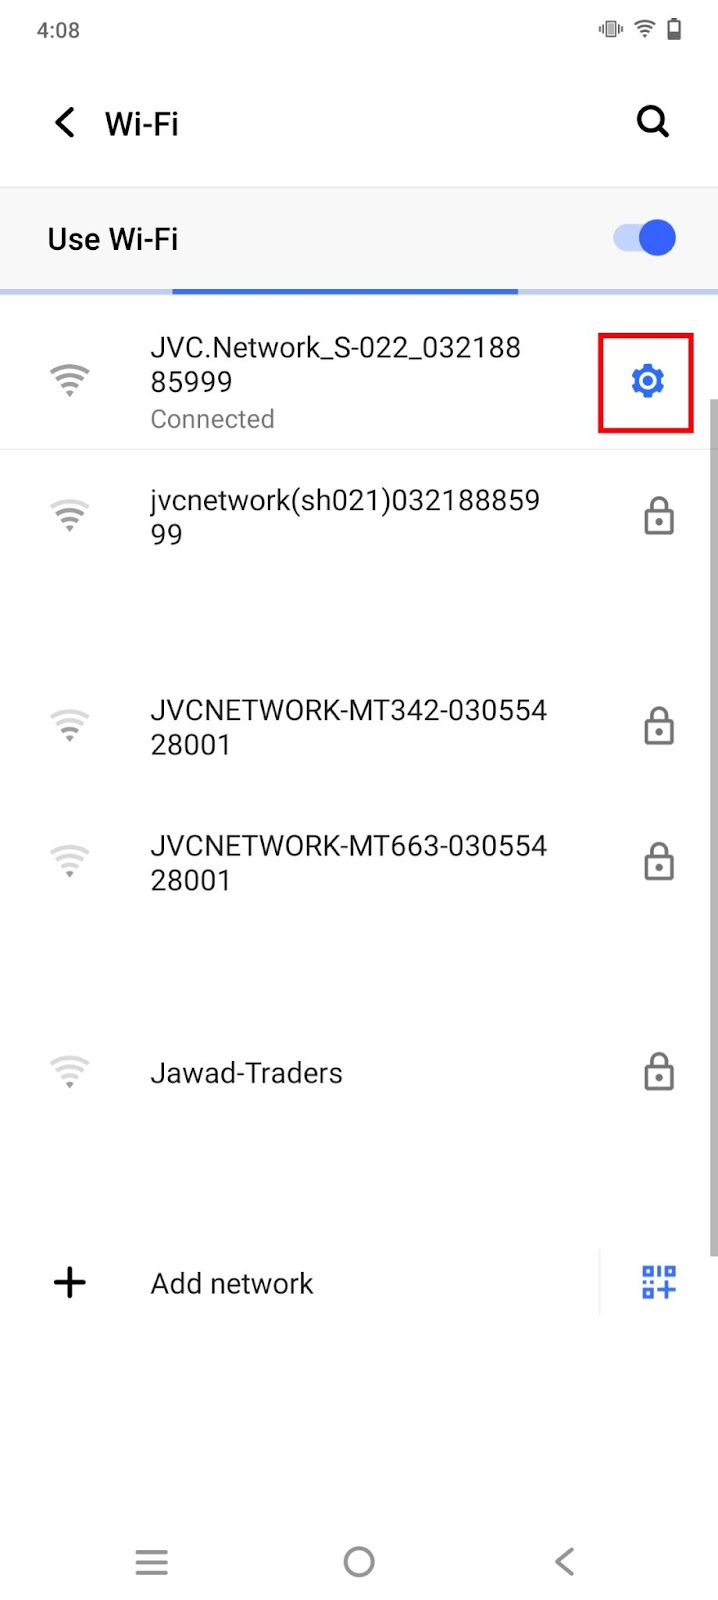
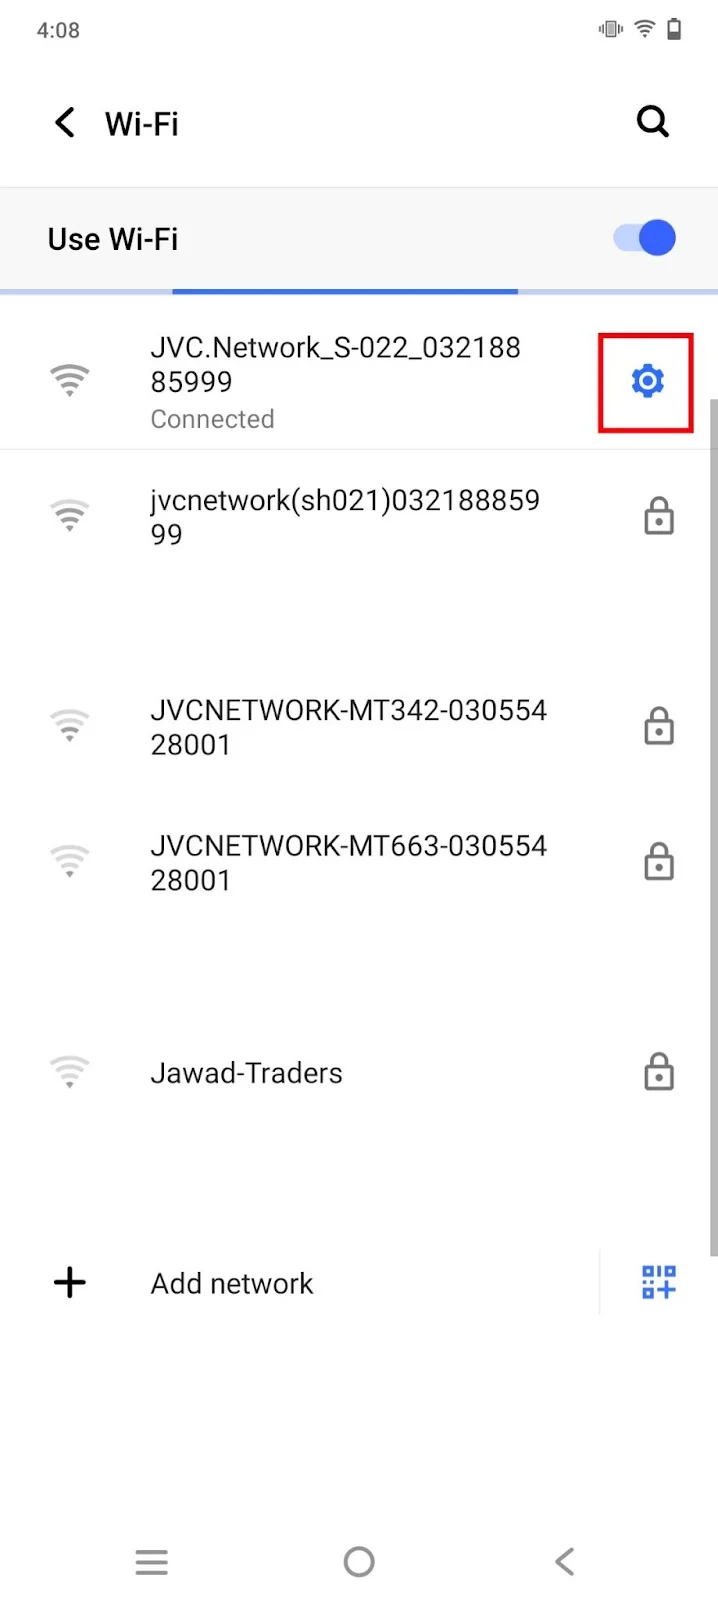
- Tap ‘Forget’
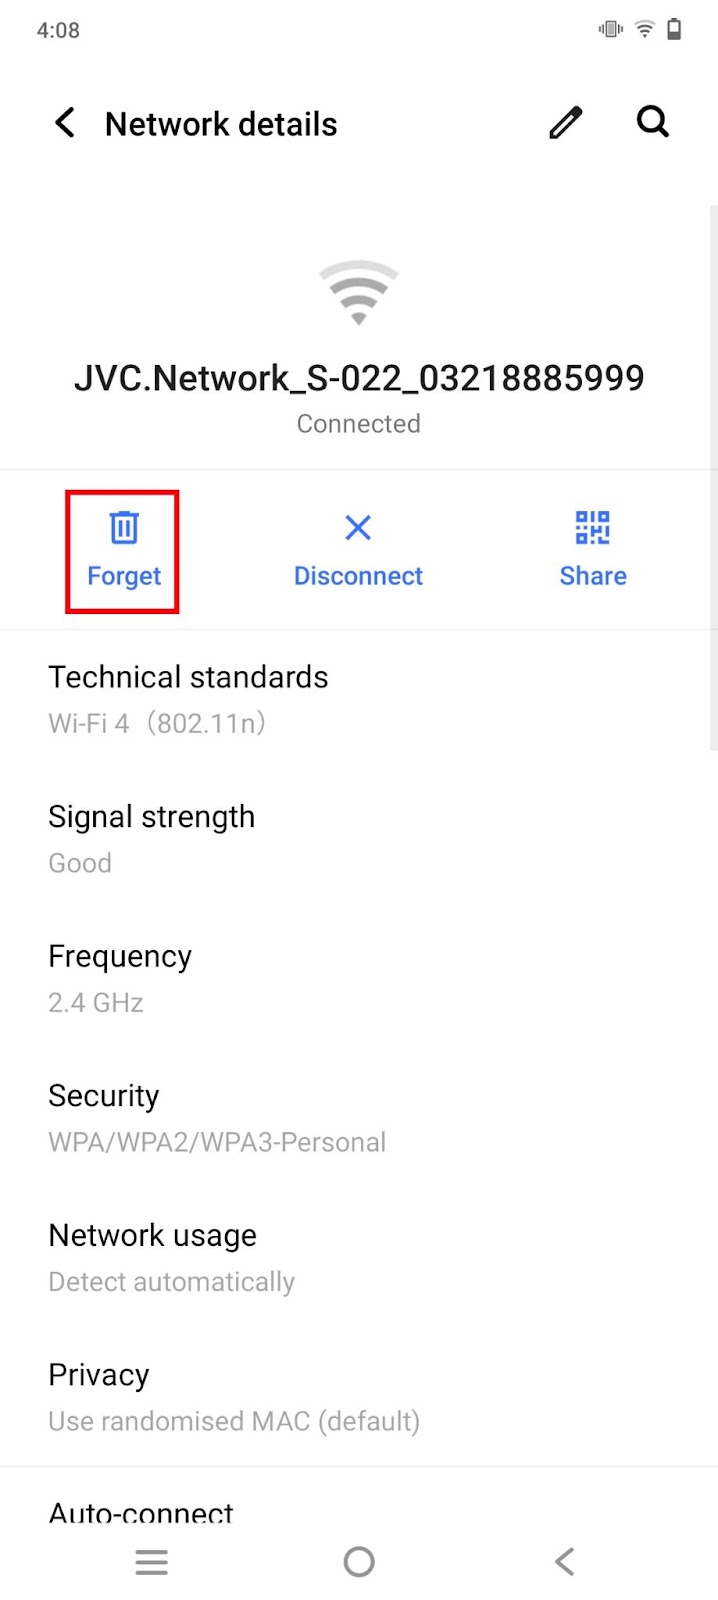

- In the quick settings, toggle WiFi off and then back on
- Select your WiFi’s (new) SSID in the list > enter the new password
Your device will be reconnected to your WiFi and the ‘Sign in to network’ notifications should stop appearing.
If the above approaches don’t work for your Android device, here are workaround solutions you can try:.
3. Reset network settings
Resetting network settings means clearing out networking data such as traffic data, passwords, and paired device information. Resetting the settings on your device will often clear out the recurring “Sign in to network”. Here are the steps:
- Go to Settings > System
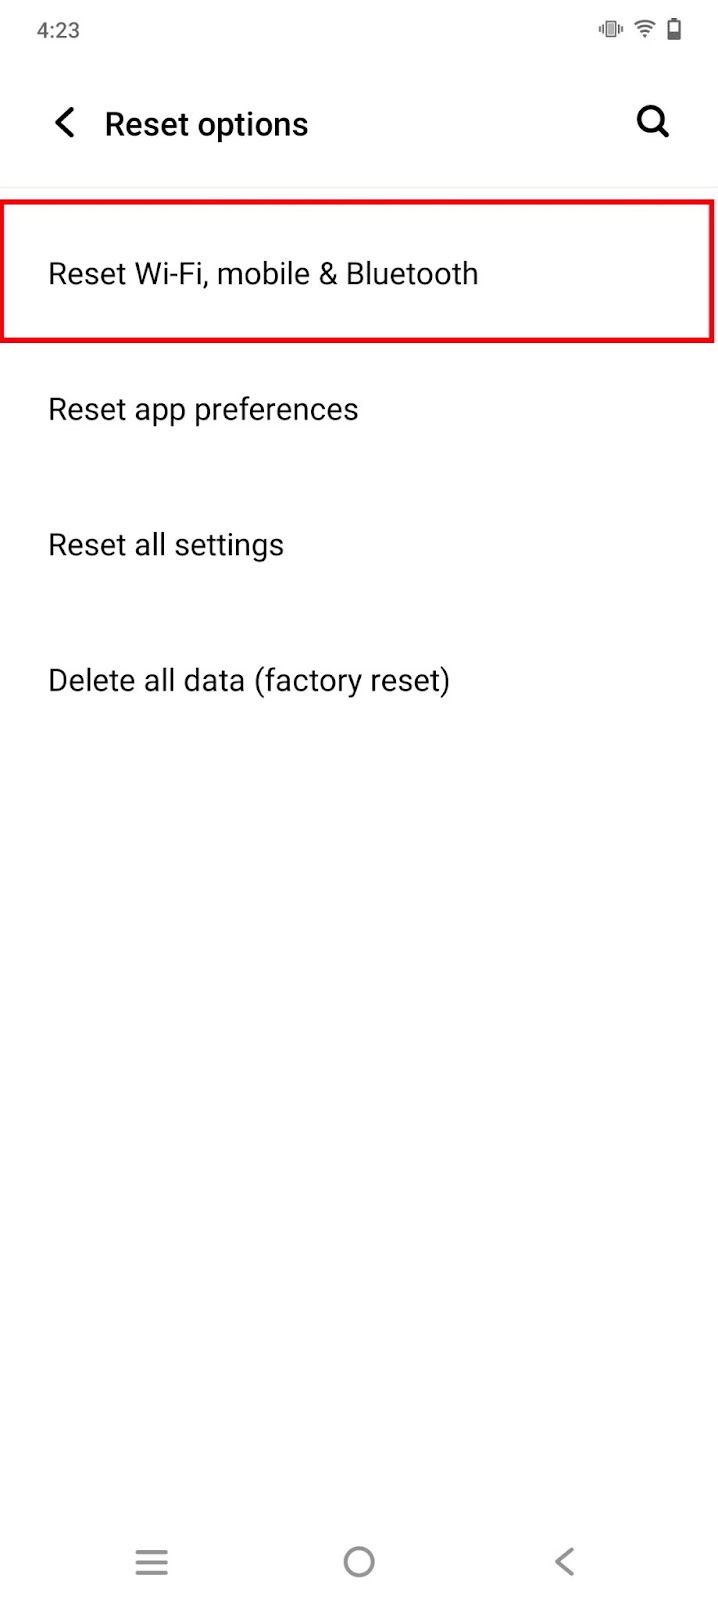
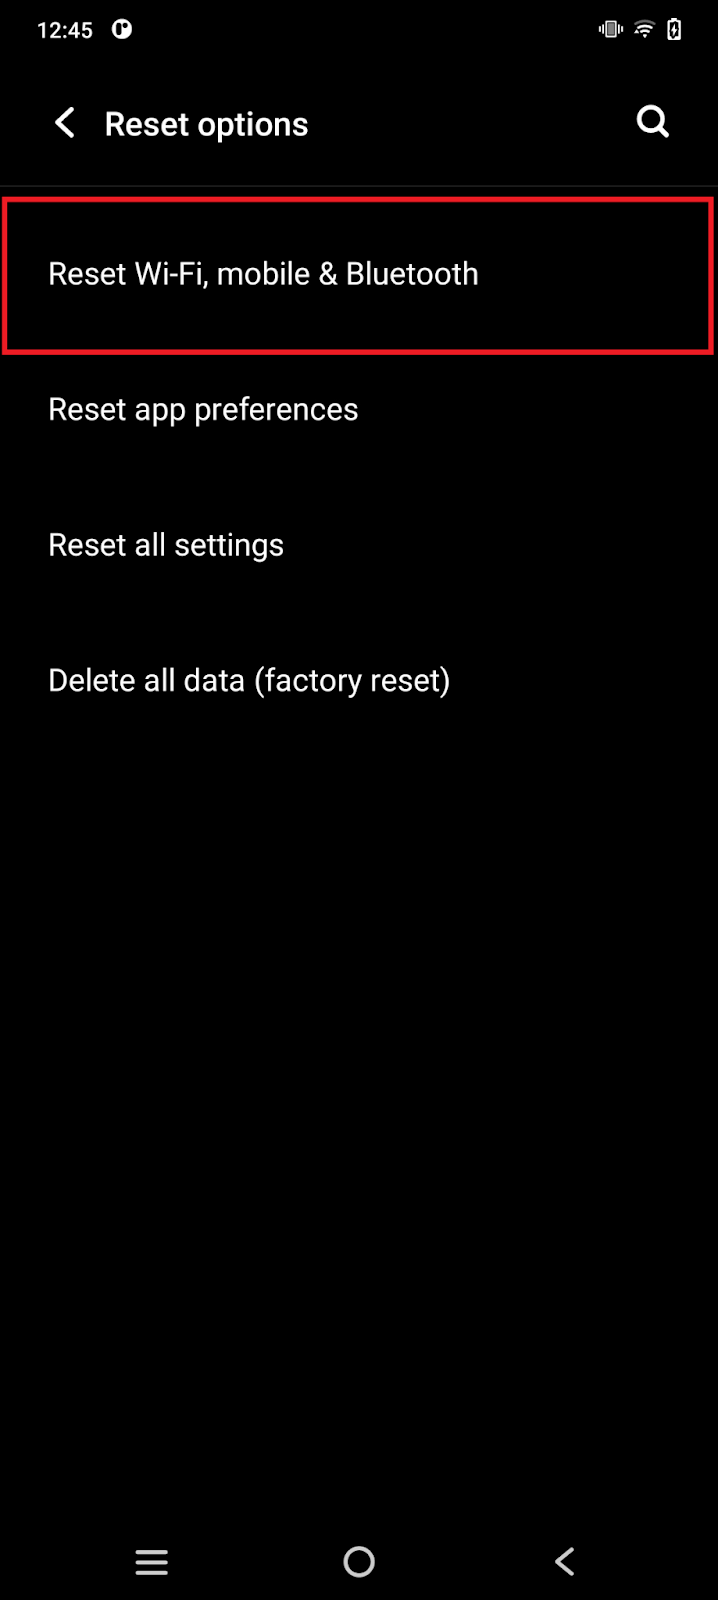
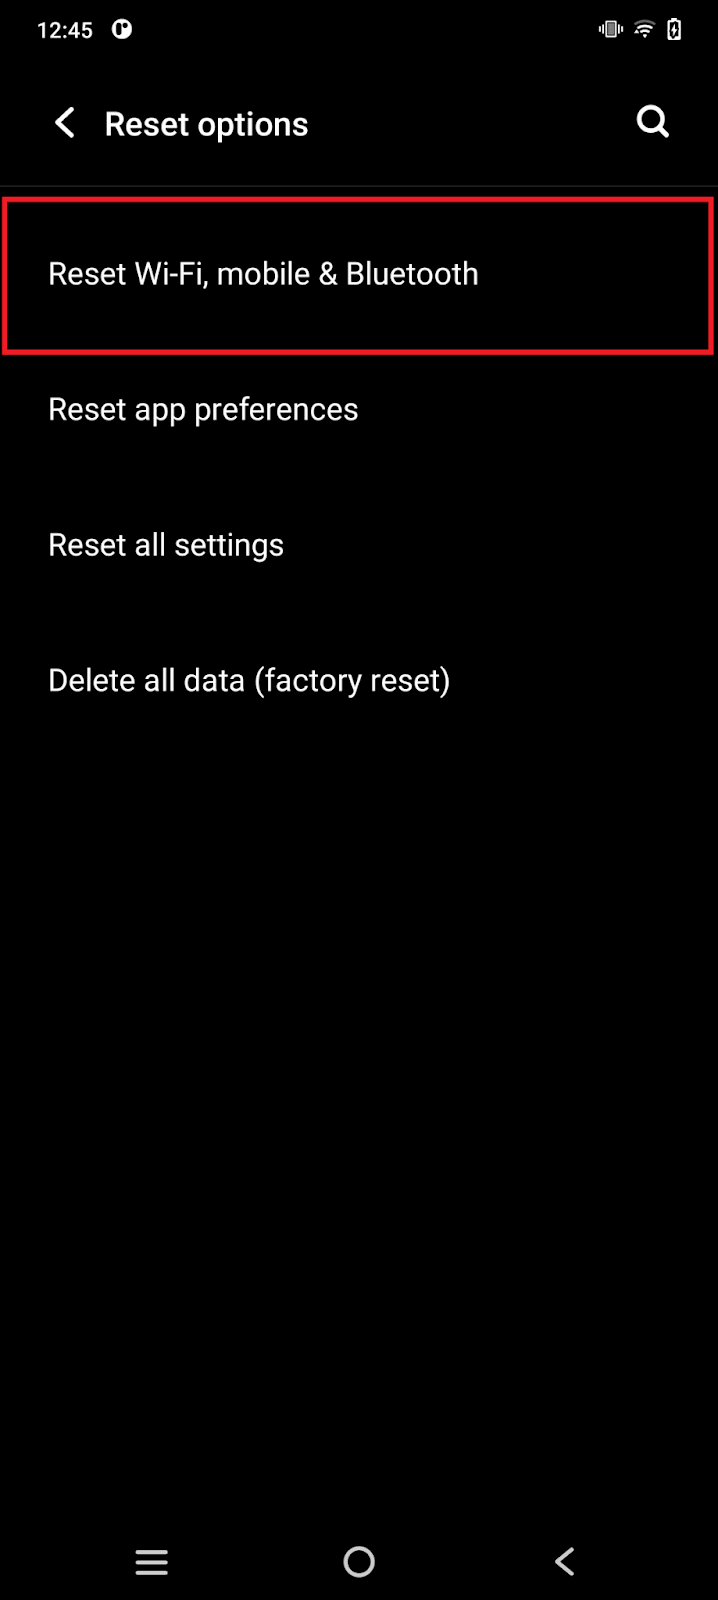
- Tap on Reset options > Reset Wifi, mobile, and Bluetooth
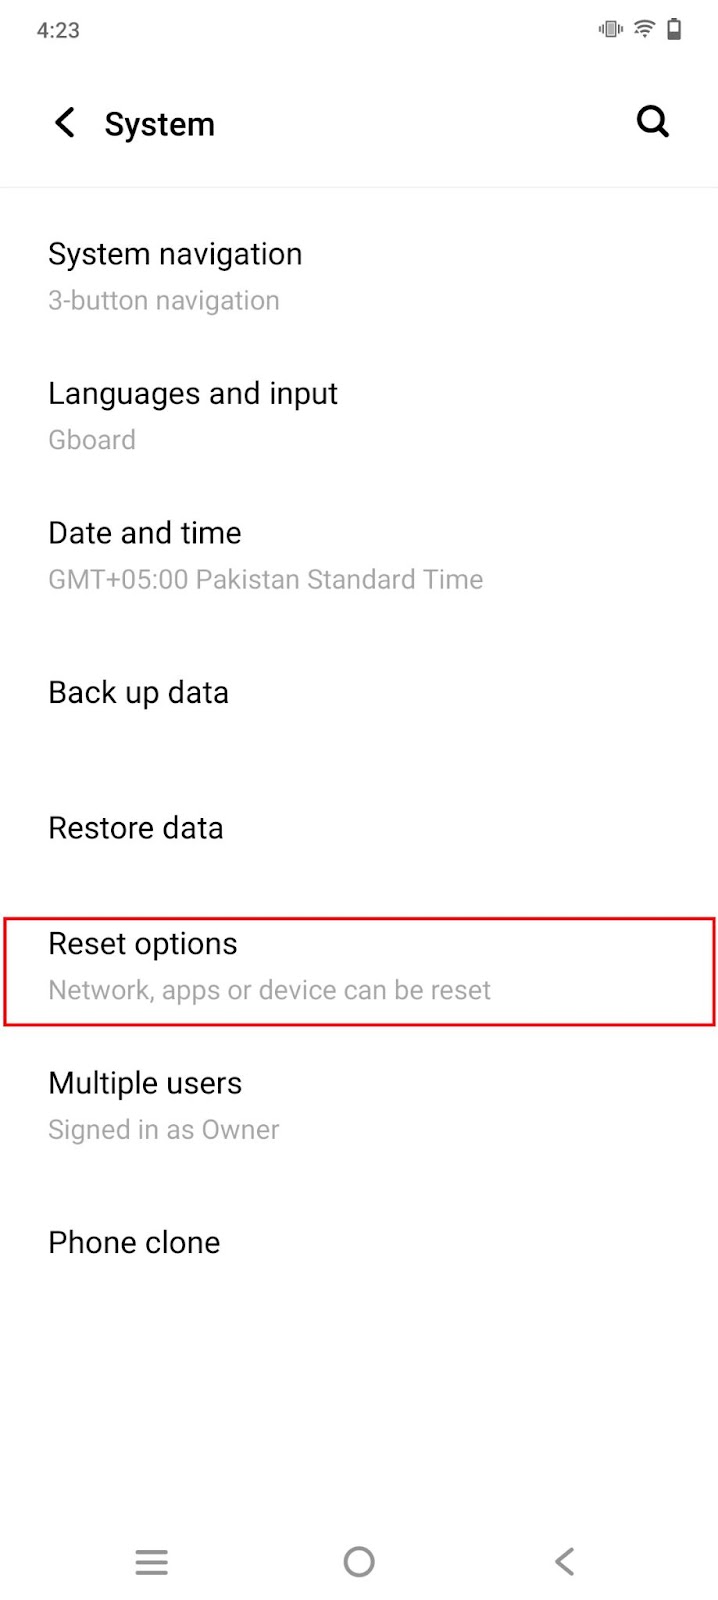
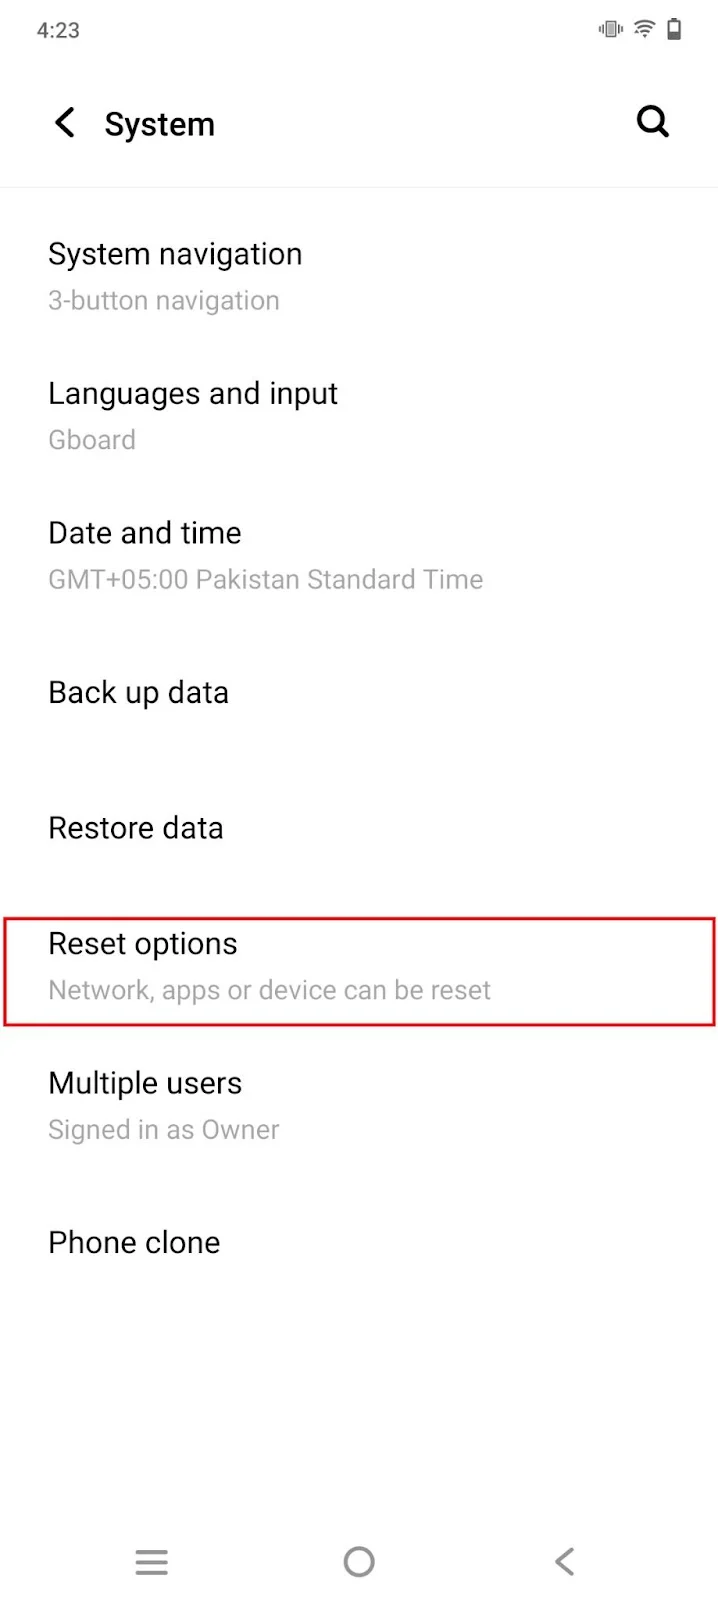

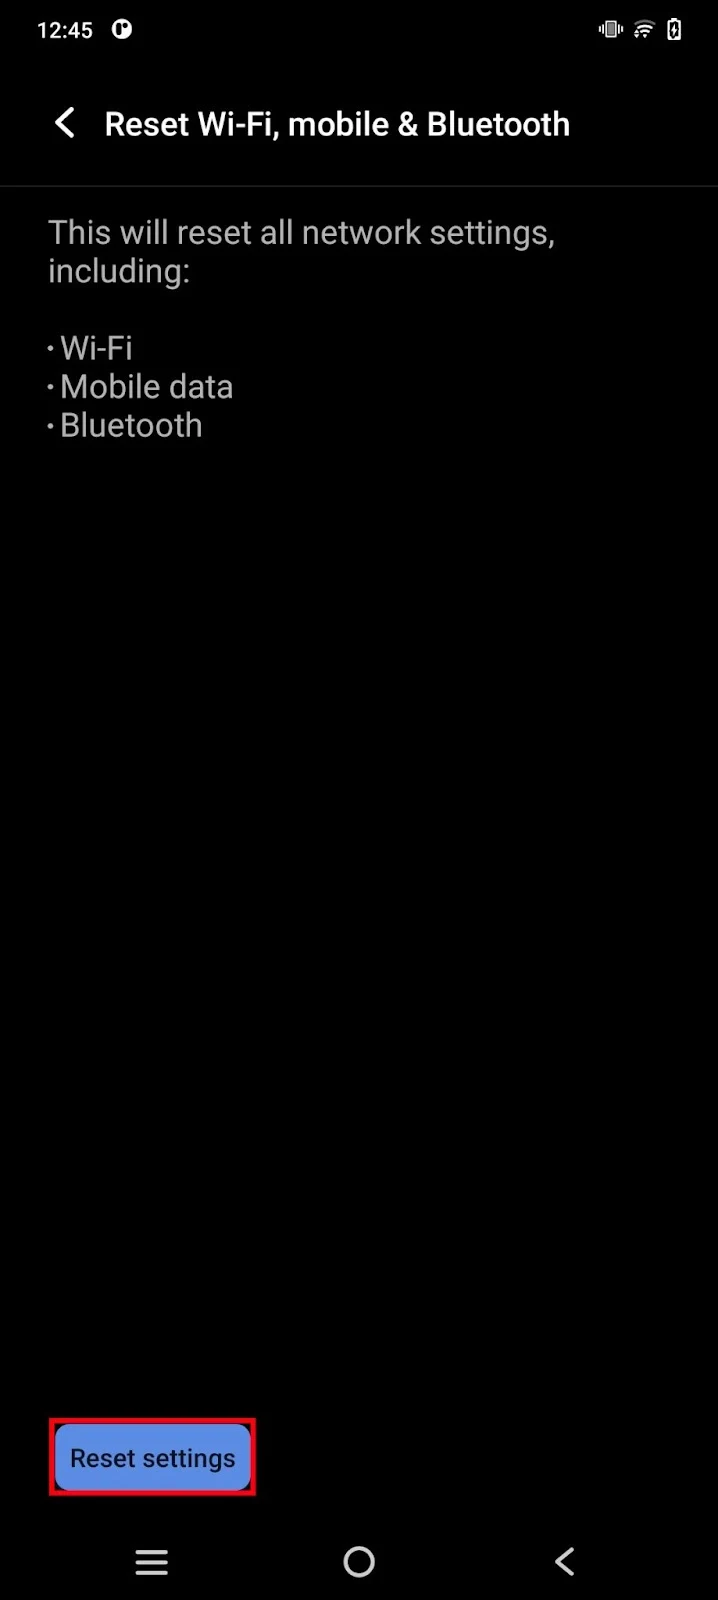
- Tap the ‘Reset’ button

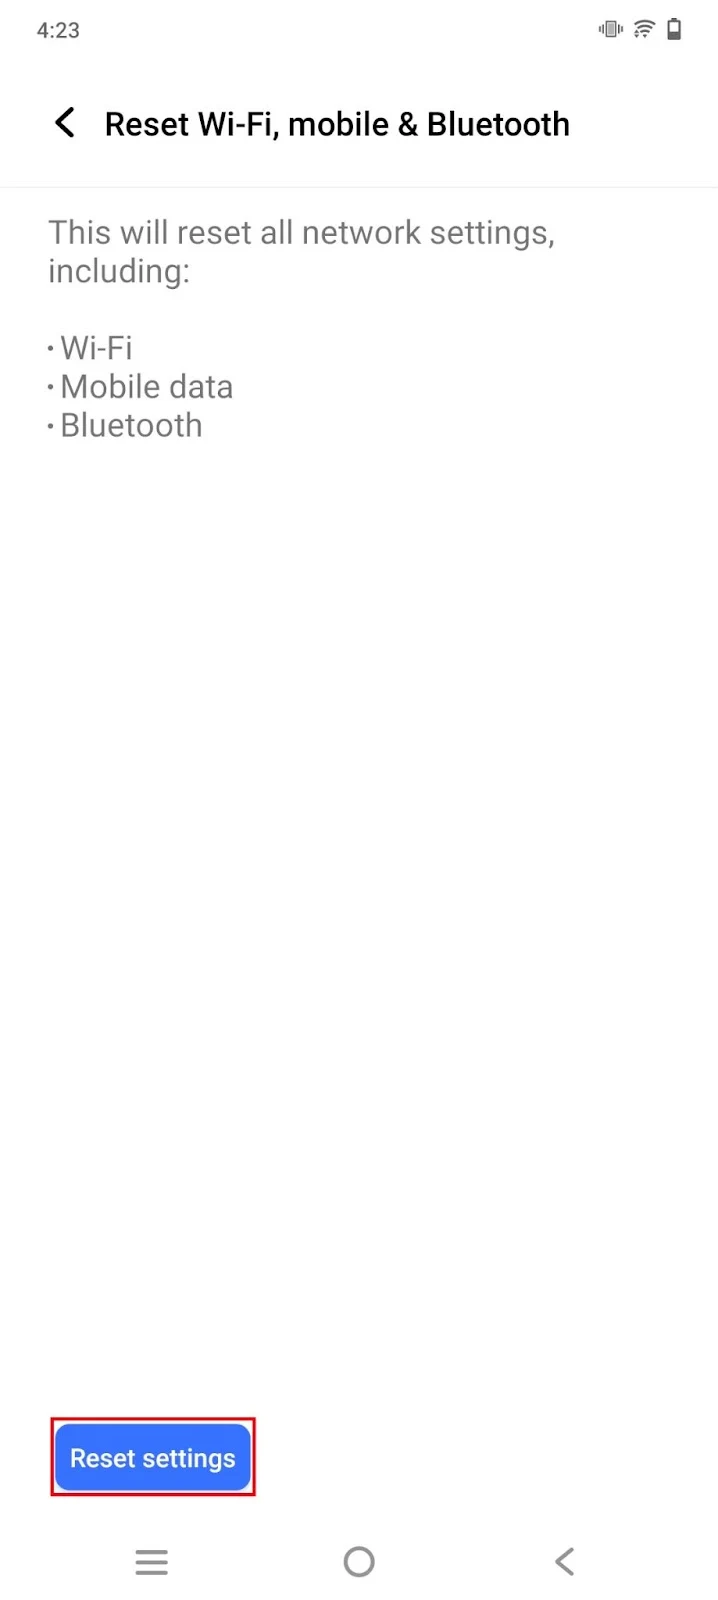
Your WiFi settings will be reset. In many cases, the ‘Sign in to network’ notification will stop showing.
4. Toggle Airplane mode
In some cases, network errors can be fixed simply by putting your device in airplane mode for a few minutes. Airplane mode disconnects the phone from all networks including wifi, cell, bluetooth etc.
Turning on Airplane mode temporarily may resolve the ‘Sign in to network’ notification:
- Swipe down the quick settings menu
- Tap on the icon to toggle on Airplane mode


- Wait for 1-2 minutes and toggle Airplane mode back off
The ‘Sign in to network’ issue will likely have disappeared.
5. Enable data roaming
Changing SIM card settings and enabling data roaming can sometimes remove the continuous ‘Sign in to network’ notifications on your device. Here’s how to do it:
- Go to Settings > Network & internet > SIM cards and mobile networks
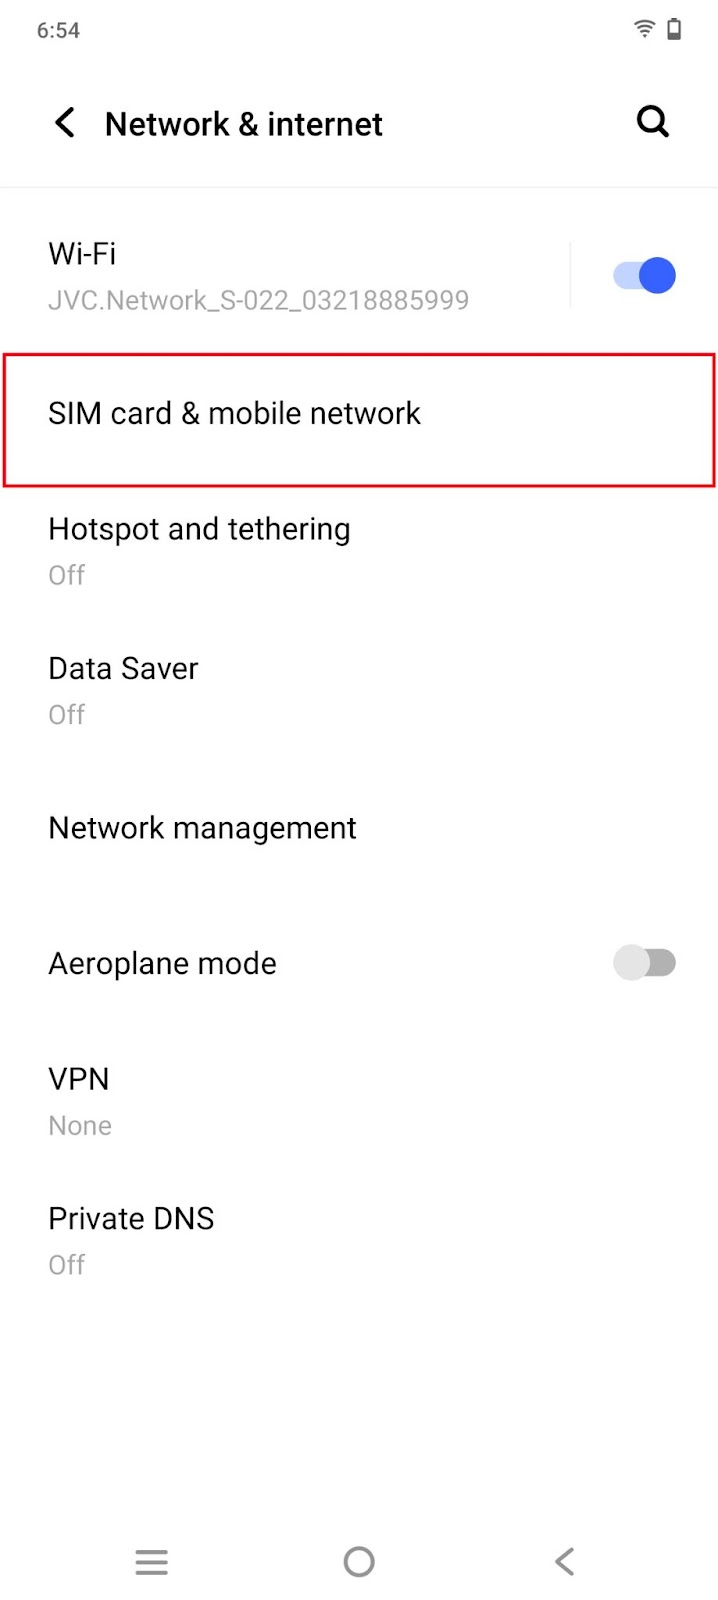
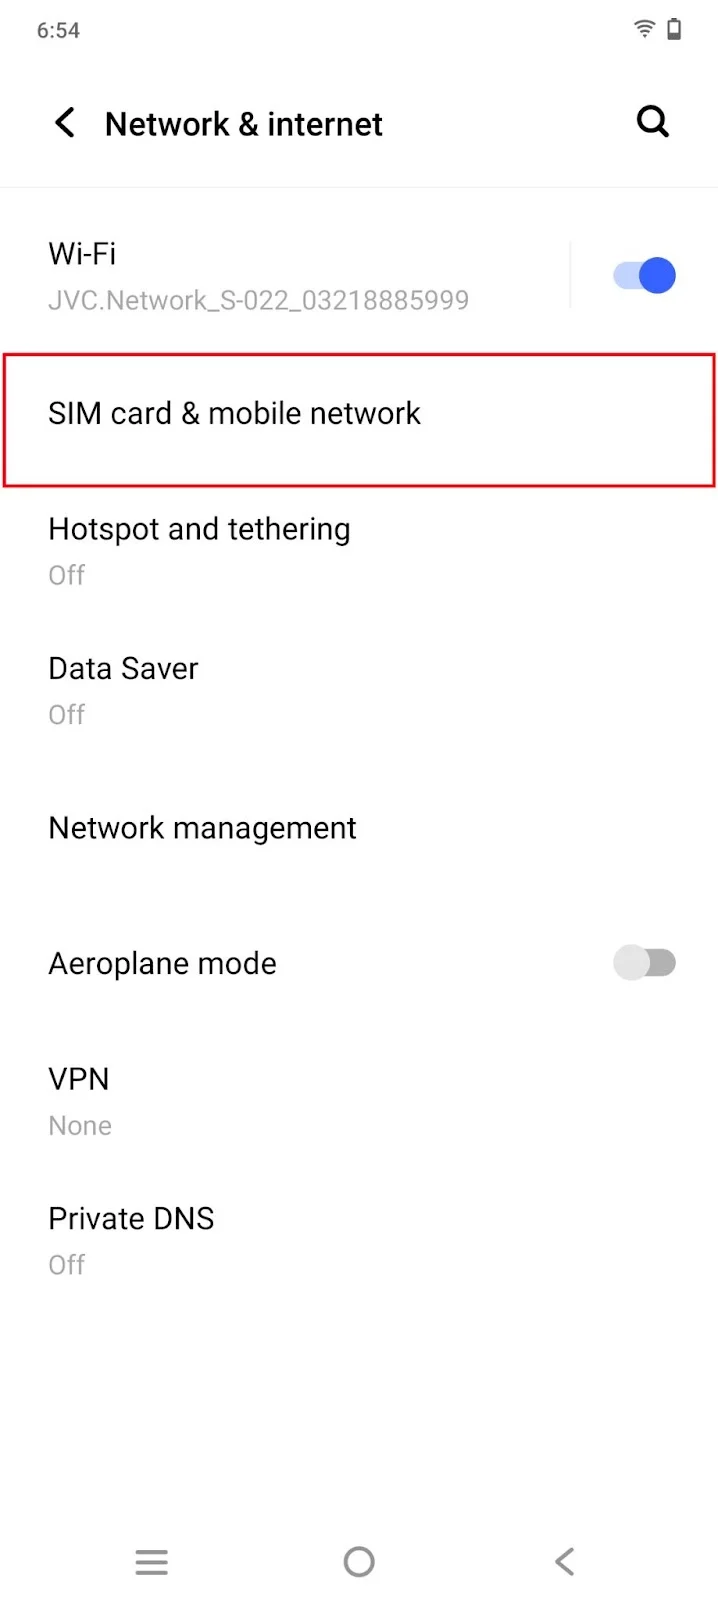
- Select the SIM card you use for data
- Tap ‘Mobile networks’ to enable manual network settings
- Select a network from the available list
- Press the back button twice > select ‘Data roaming’
- Tap ‘Data roaming’ > select ‘Aways’
In many cases, this will make the ‘Sign in to network’ notification go away for good.
Note that allowing data roaming can cause extra charges if you go out of your network carrier’s coverage area, i.e., international travel. Remember to turn the setting back off before traveling.
6. Session-based public WiFi network
A session-based public WiFi network allows a user to use internet services through a public network after the user signs in to the network using a portal.
The user can connect to the network without a PSK (password). The network then prompts the user to ‘Sign in to the network’.
New users must sign up to the network by providing an email or a phone number. The user receives a password that they can use to ‘Sign in to the network’ for a session. A session can last from an hour up to 24 hours.
Once the session expires, the network will prompt the user to ‘Sign in to network’ again. The user must repeat the sign-in process to renew the session.
How do I get my Android to automatically connect to WiFi?


The WiFi disconnects when you go out of its range. If you have automatic connection to the WiFi network disabled on your Android, you will need to manually connect to the WiFi after each disconnection, e.g. each time you get back in range..
Here are the steps to allow your Android to reconnect to a selected network automatically:
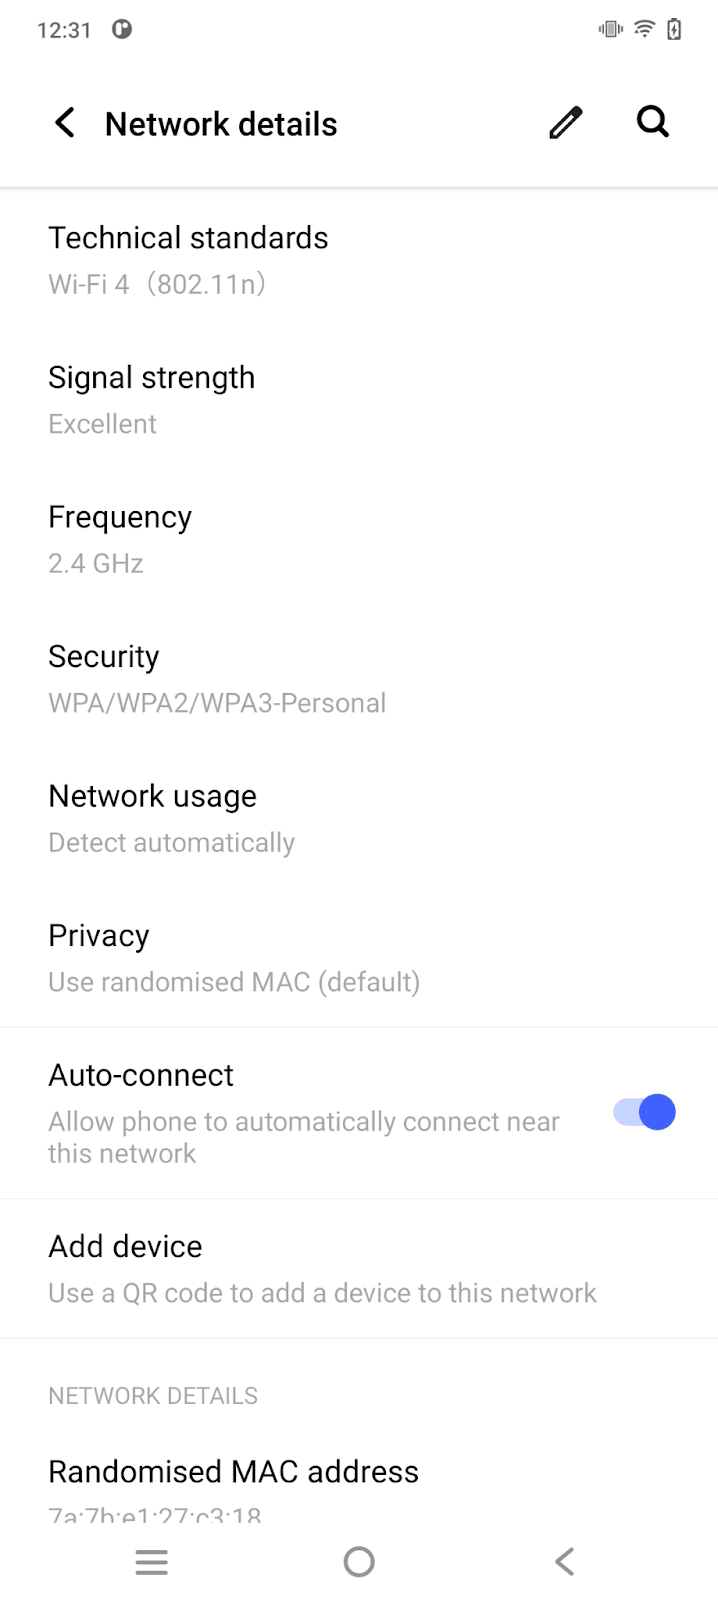
- Pull down the quick settings menu
- Press and hold the WiFi icon
- Scroll down and toggle on ‘Auto-connect’

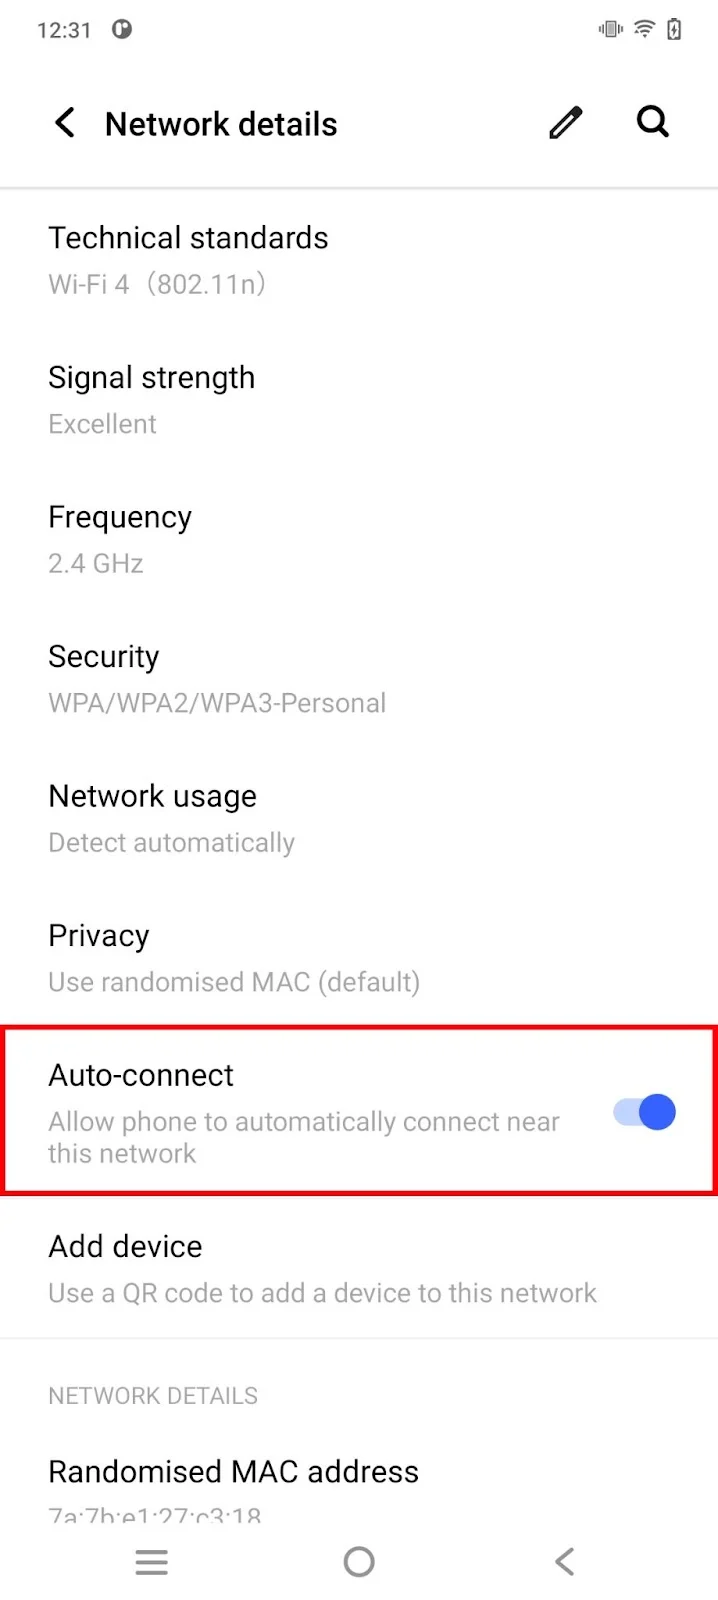
Automatic connection will now be turned on.
In your Android device, you also have the option for your device to turn on WiFi automatically whenever your network is in the range:
- Go to Settings > Network & internet > WiFi
- Tap on ‘WiFi preferences’

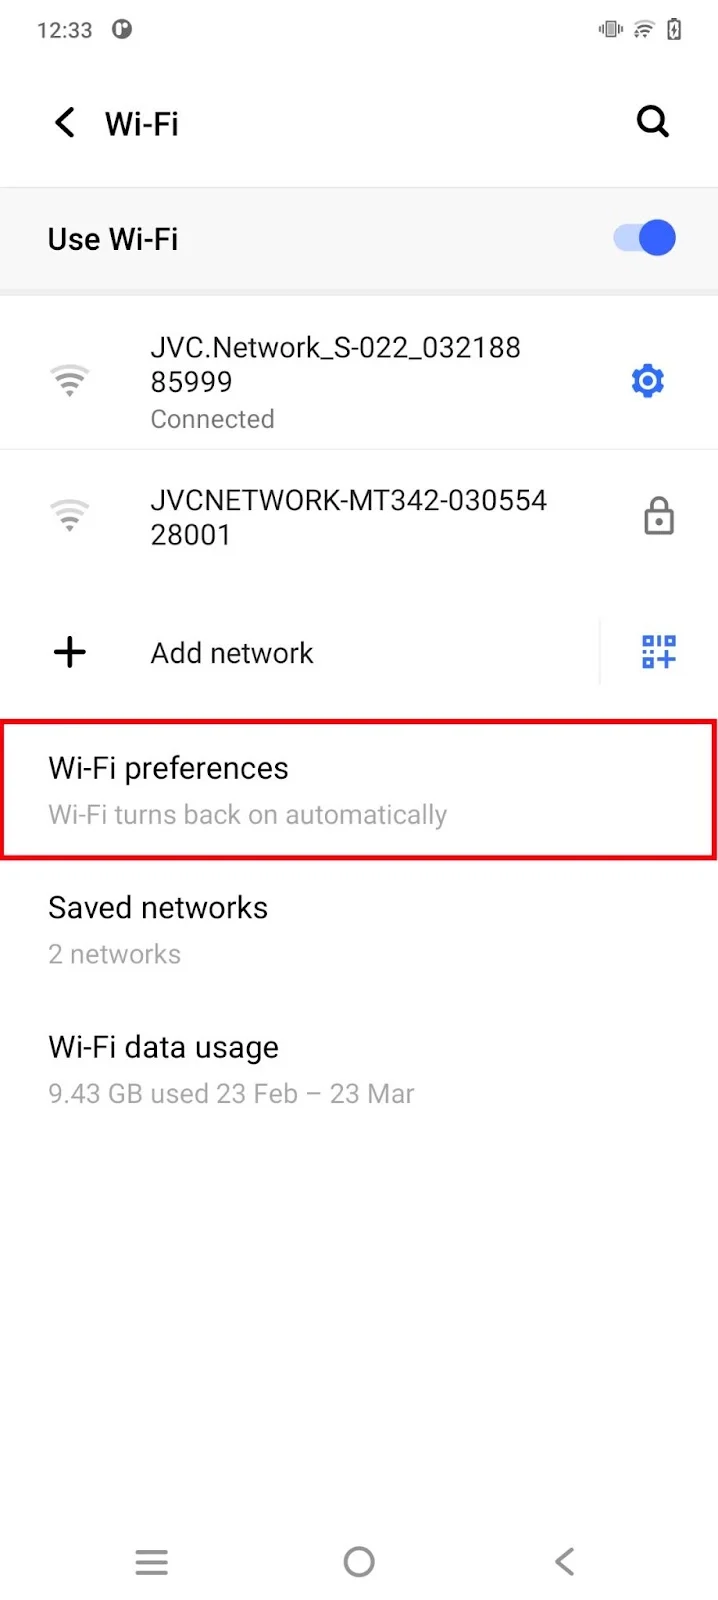
- Tap on ‘Turn on WiFi automatically’
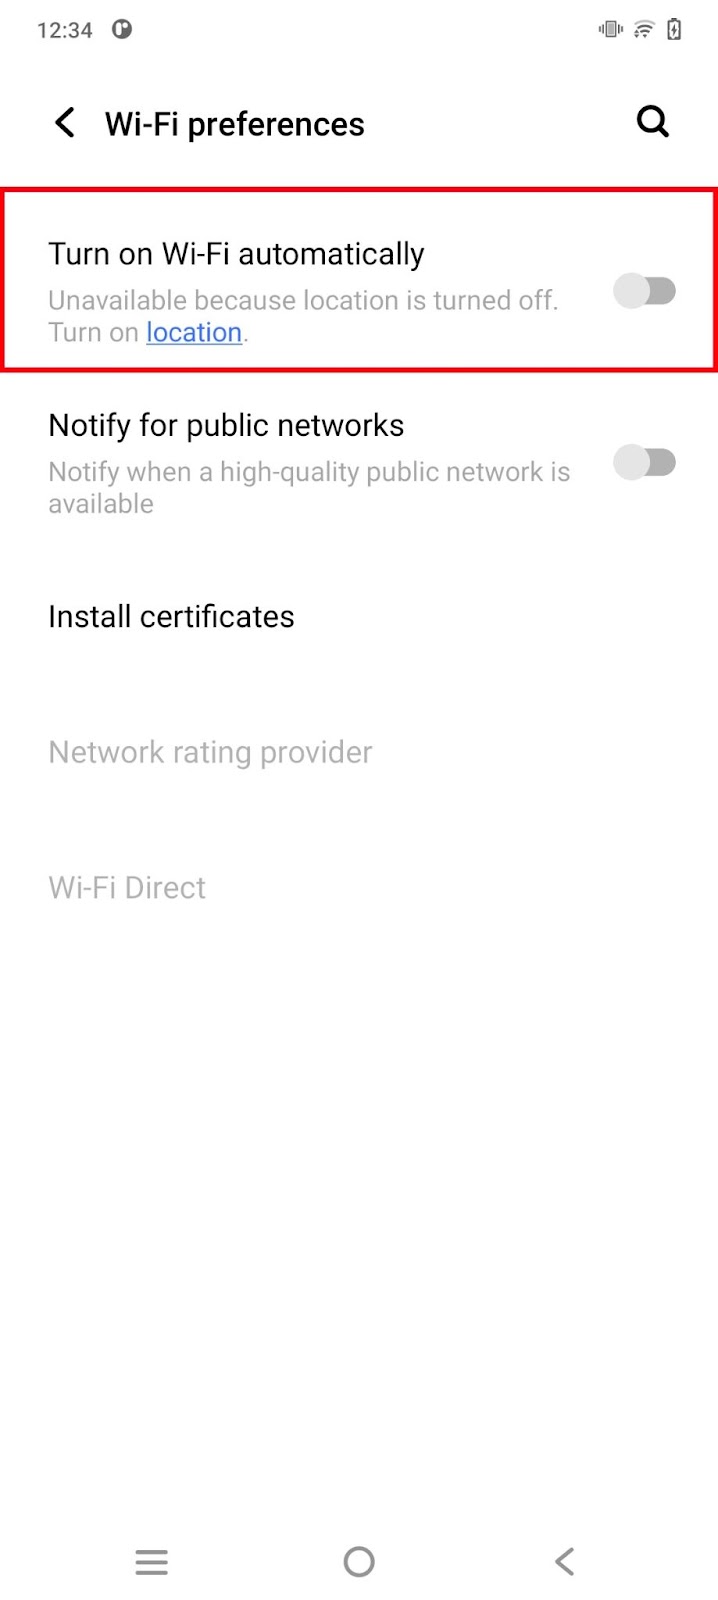
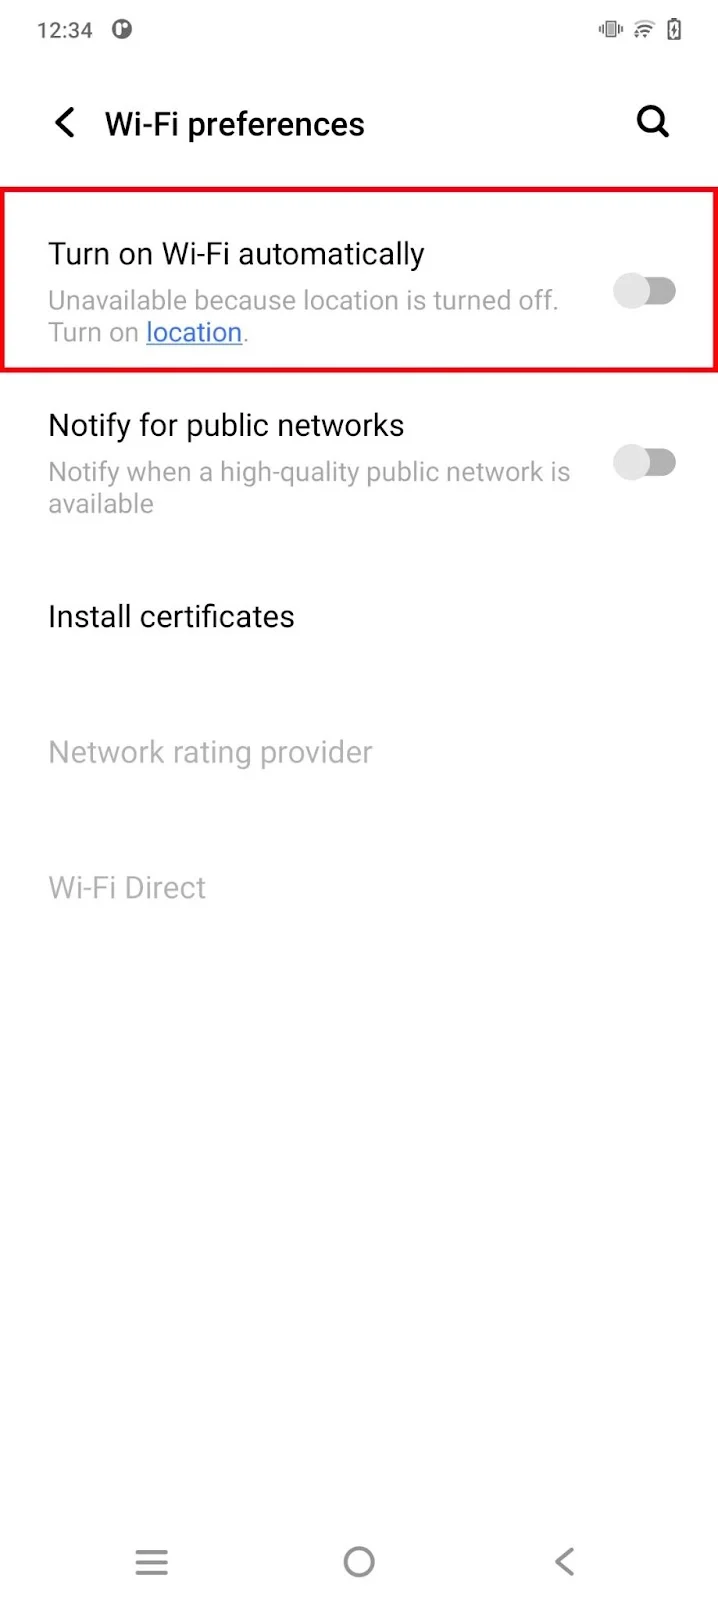
Your device’s WiFi will now turn on whenever your device is in the range of your selected network.
Note that you must keep your device’s location turned on for this feature to work as it detects the available network based on location.
How do I stop my Android from automatically connecting to WiFi?
Your device can automatically connect to an open public WiFi network whenever one is in range. This can be dangerous since anyone can access public networks and possibly your device in certains conditions.
Here’s how to prevent your Android from automatically connecting to public WiFi networks:
- Go to Settings > Network & Internet > WiFi
- Tap ‘WiFi preferences’
- Toggle off ‘Connect to public networks’
How do you reset network settings on Android?
Your device network adapter gathering excessive data over time may cause network issues, possibly resulting in really low speed on your device.
You can reset your network settings on Android and clear out your internet and networking data, including traffic data, passwords, and paired device data:
- Go to Settings > System
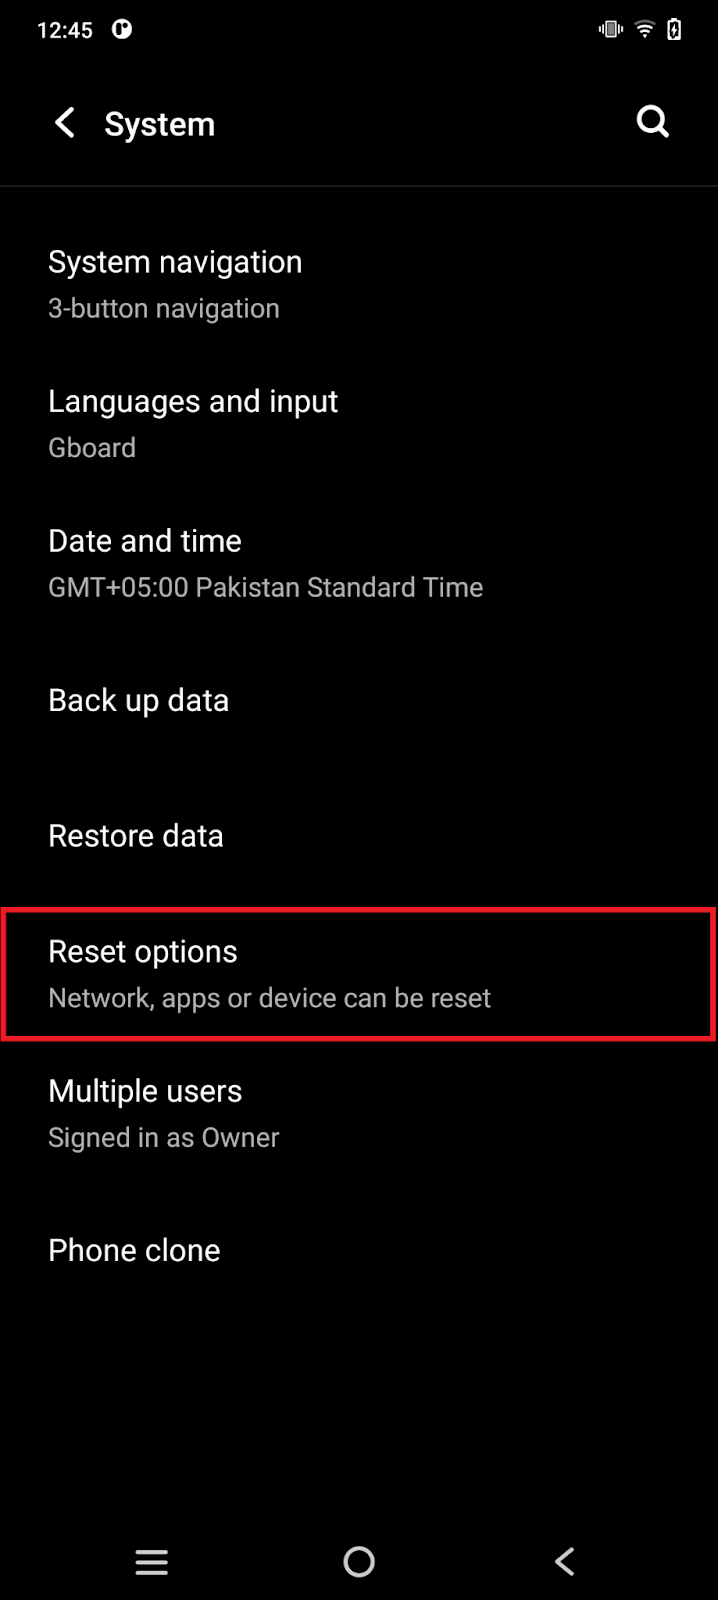
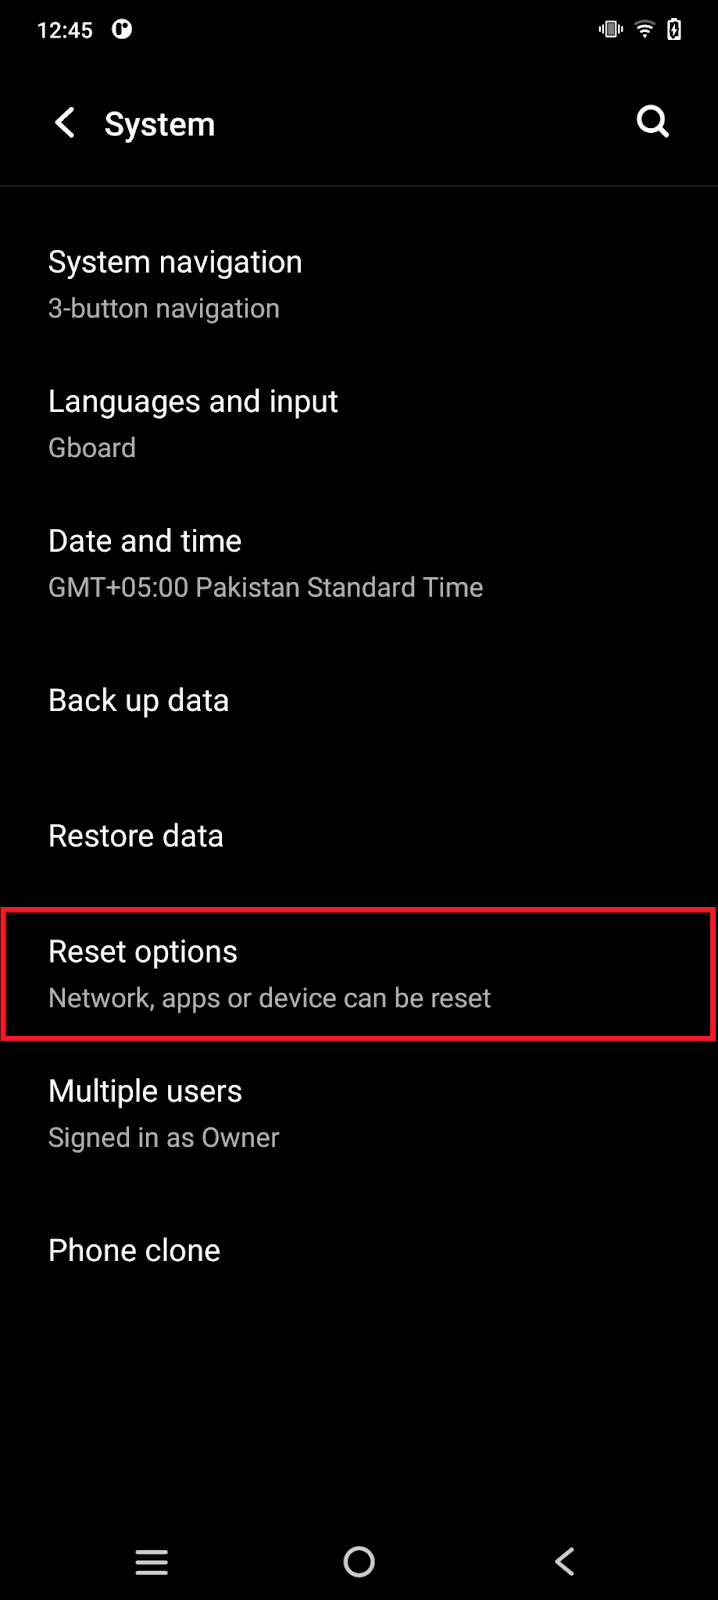
- Choose Reset options > Reset Wifi, mobile, and Bluetooth
- Tap ‘Reset’

Your device network settings will be reset to default.
Will I lose anything if I reset network settings?
Network reset is not the same as factory reset. It simply clears out network-related data on your Android device.
You will not lose any personal data such as images, files, or browsing data. However, your device will shed network cache, traffic data, and your WiFi network password.
You may have to ‘Sign in to the network’ again after you perform a reset on the network settings.
How do I change APN settings on Android?
APN (Access Point Name) is the gateway between the internet and your network carrier. It provides your device with information regarding the network it is connecting to, its IP address information, and the relevant security settings.
Your network carrier uses this information to connect your device to the internet.
You can change APN settings on Android to increase the speed of your network, solve network connection issues, or fix certain SIM issues. Here are the steps:
- Tap Settings > Mobile networks
- Tap Access Point Names
- Tap the Menu button and select New APN
- Add details for the new APN
- Tap the Menu icon > Save
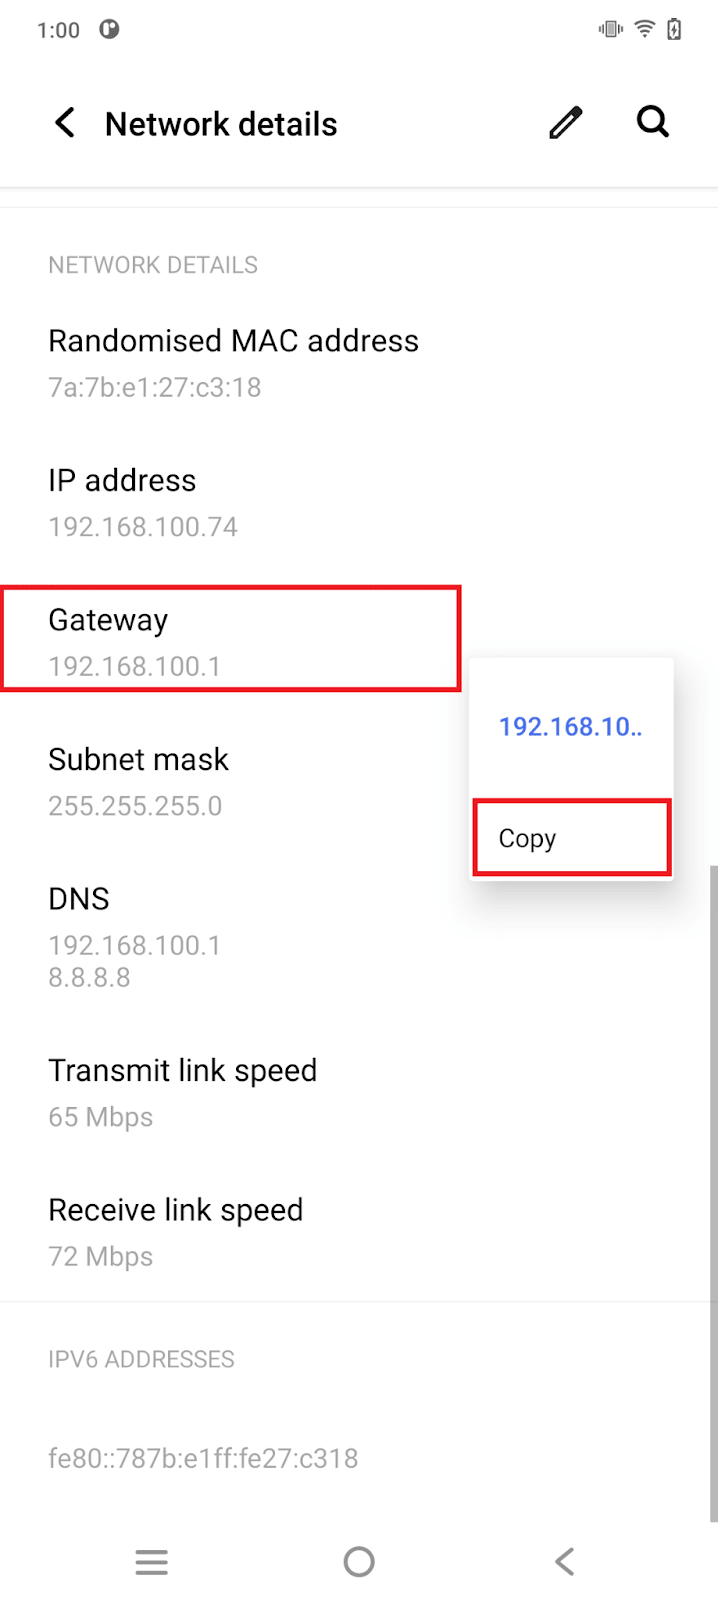
How do I find my WiFi IP address on my Android?
Here’s how to find the WiFi IP address of your Android device:
- Pull down the quick settings menu > press & hold the WiFi setting icon
- Select the WiFi network you are connected to
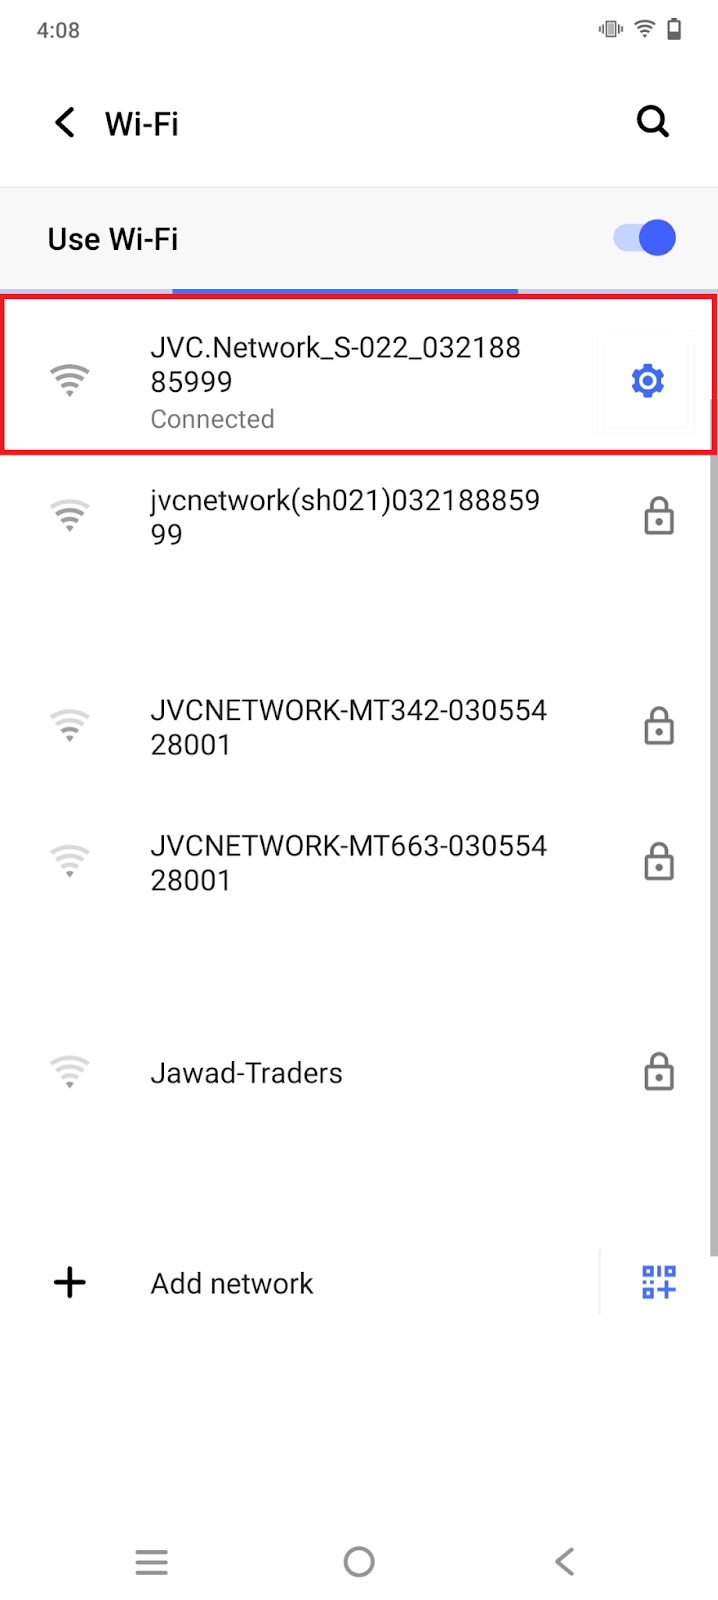
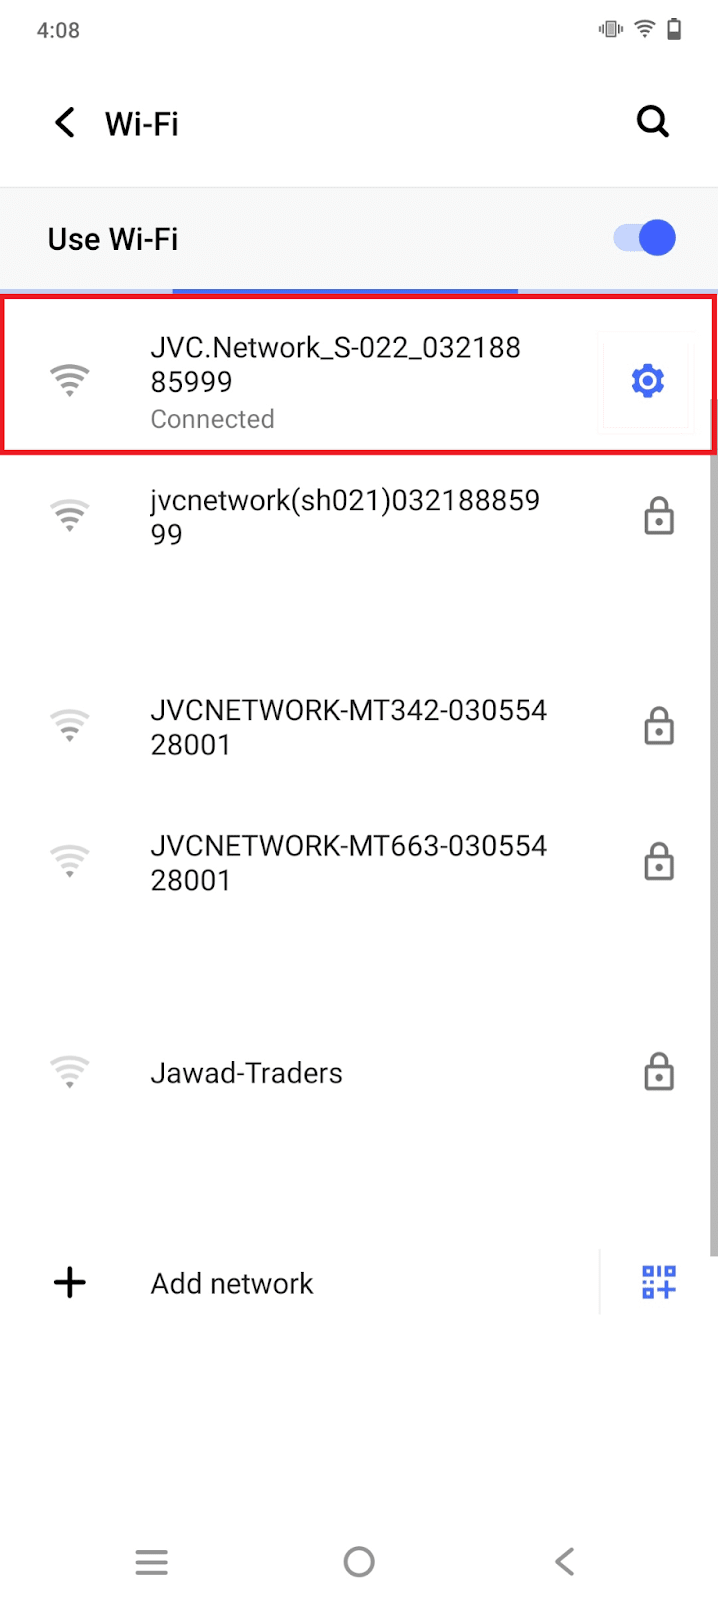

Your WiFi information will be displayed including your WiFi IP address.
How do I change my network password on Android?
If unauthorized users start using your internet, your connection may get slow.To avoid this, it is good practice to change your WiFi password from time to time:
- Connect to your WiFi network
- Follow the steps in “How do I find my WiFi IP address on my Android?” to open WiFi details
- Press & hold the ‘Gateway’ option and tap ‘Copy’ to copy the gateway address
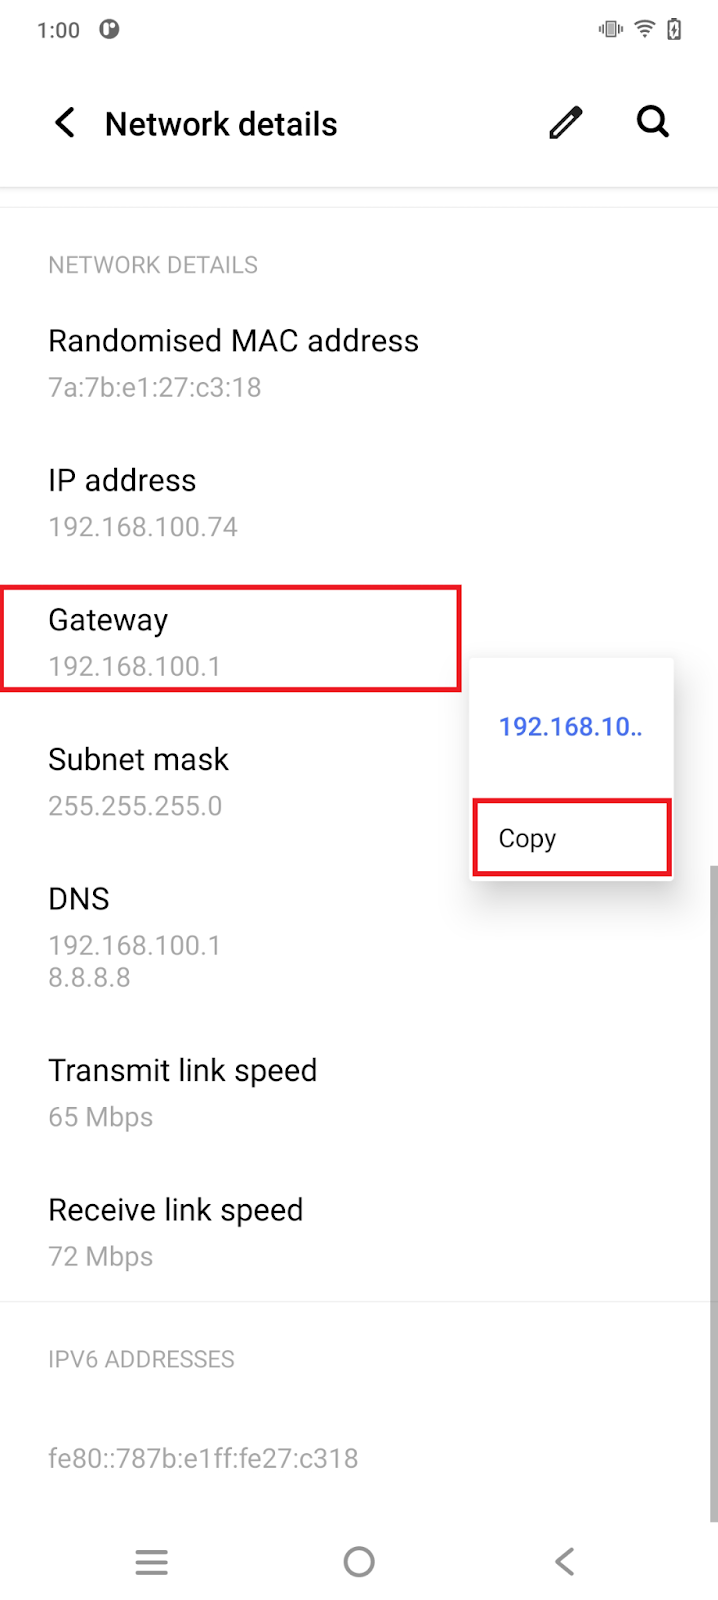
- Open your browser, paste the gateway address in the search bar, and hit enter. Your router network portal will open
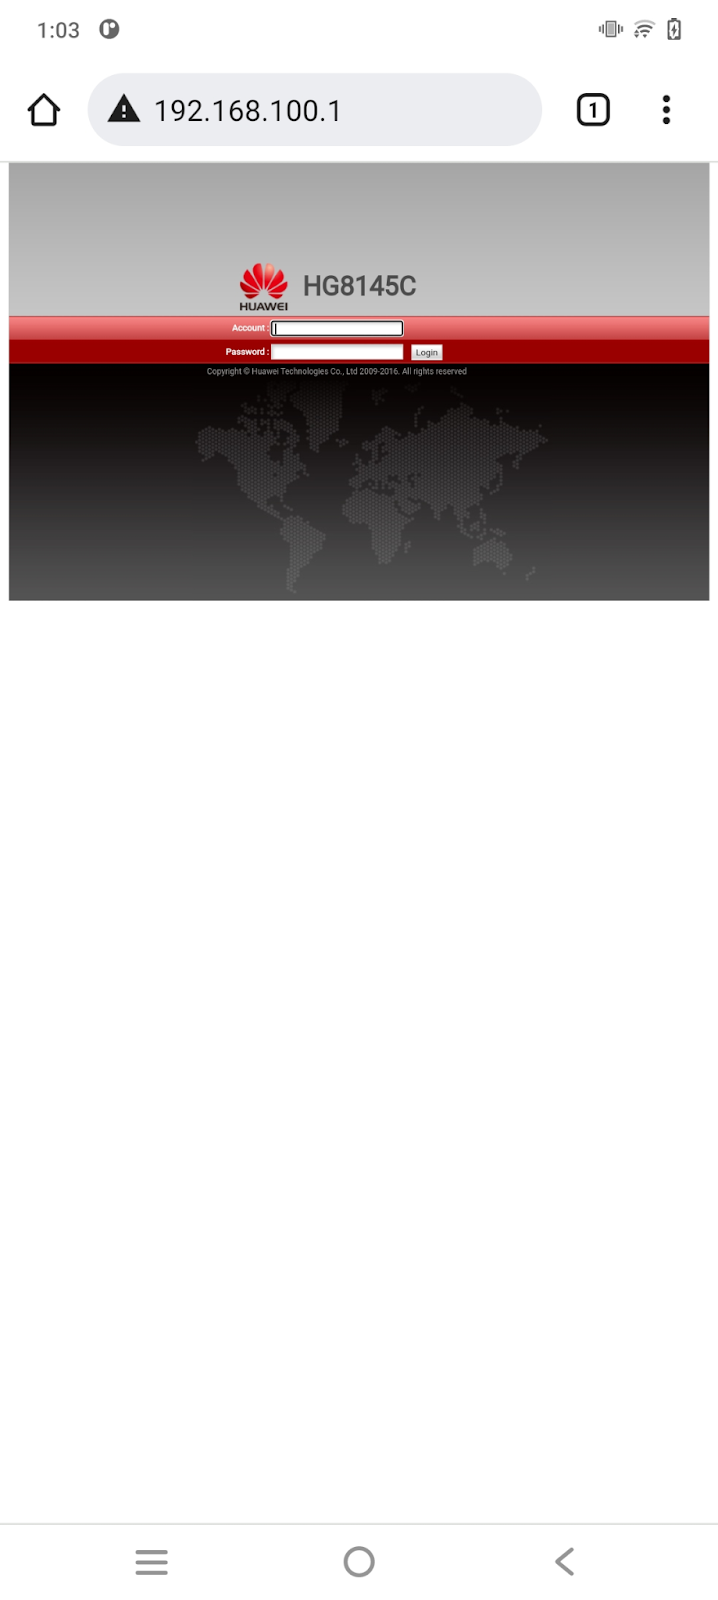
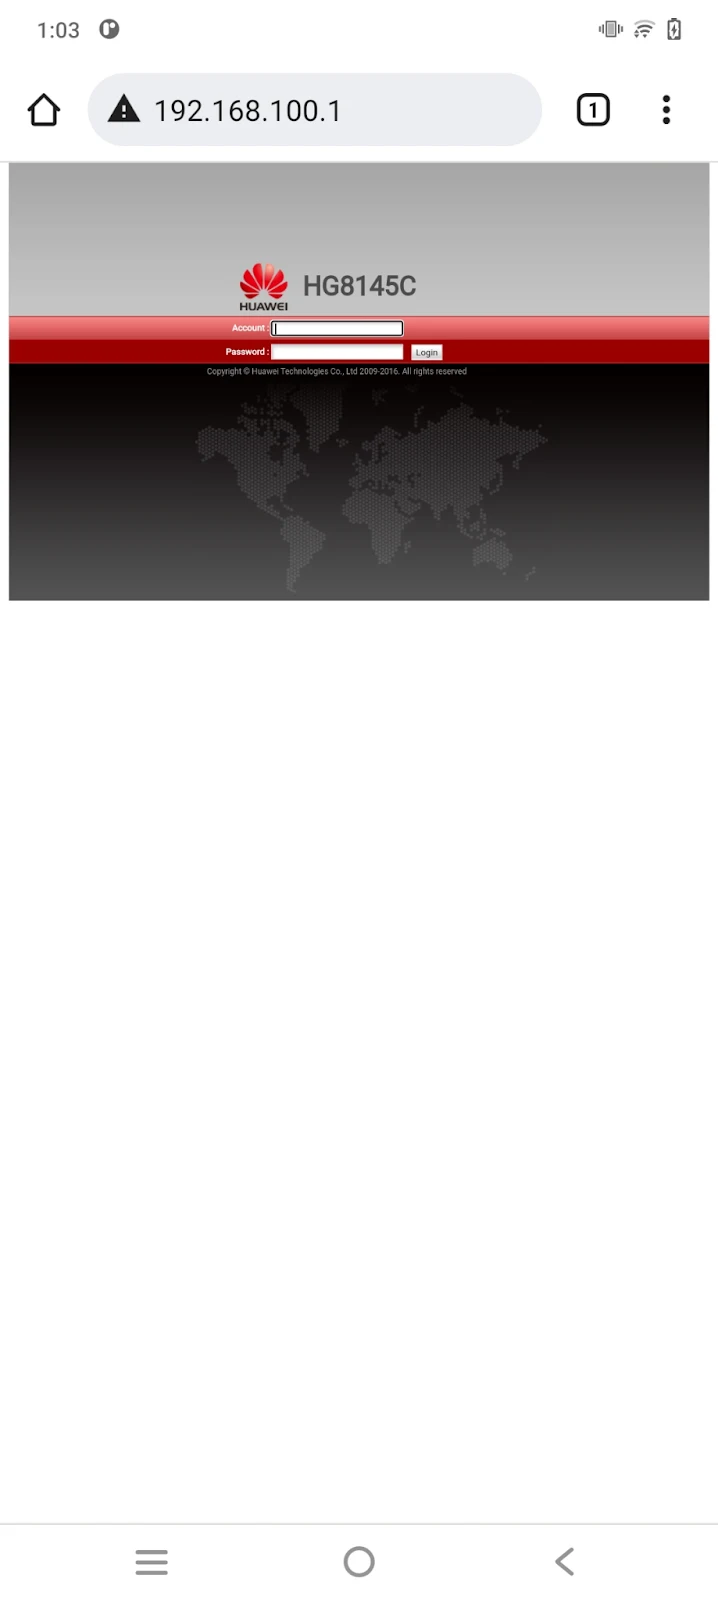
- Enter your account credentials provided by your internet provider
- Change the password using the portals settings
Why is my Android phone connected to WiFi but no internet?
There are a few reasons why your phone may not have internet even though it’s connected to the Wifi network:.
- Server problem from your internet provider
- Router issue
- Issue in your device network settings
- Issue with your Android system update
Before contacting your internet provider, try one of the solutions in the section “How do I stop “Sign in for network” notifications?” above.