
What’s great about Apple products is their compatibility with each other. That allows users to seamlessly transfer data across their iOS devices.
However, backing up your iPhone’s data to your iPad isn’t as straightforward as it may seem, and in many cases, you’ll be left with compatibility issues.
Read more as we delve into how you can back up your iPhone’s data to your iPad.
- Can you back up an iPhone to an iPad?
- Is it possible to restore an old iPhone backup to an iPad?
- How do you transfer pictures from an iPhone to an iPad?
- How do I transfer music from an iPhone to an iPad?
- How do you transfer apps from an iPhone to an iPad?
Can you back up an iPhone to an iPad?
You can transfer your iPhone’s data to your iPad by backing up your files on iCloud and syncing your iPad with the same iCloud account. If your iCloud has limited storage, you can alternatively use iTunes or third-party apps to share data across your Apple devices.
To back up your iPhone to an iPad through iTunes, you’ll need access to a PC or a Macbook. Keep in mind that iTunes is only available for earlier iOS versions (below iOS 13).
On devices that run iOS 13 and later, you can only use iCloud or third-party applications to transfer your data.
How do I back up my iPhone to my iPad without iCloud?
iCloud is Apple’s cloud storage app which comes with 5 GB of free space to store your pictures and files. If your data exceeds the storage limit, you won’t be able to completely back up your iPhone.
Although you can purchase extra iCloud storage to back up your iPhone’s data, you can opt for iTunes (on iOS 13 or lower) or third-party applications to get the job done without incurring any additional charges.
For security reasons, most people opt for Apple’s official iCloud or iTunes to sync the files between their iOS devices.
Method #1: Wired transfer via iTunes
Apple’s iTunes allows you to encrypt your data, protecting it from landing in the wrong hands, by placing a secure password on the backup.
To transfer files between your iPhone and iPad over iTunes, using a lightning cable, follow these steps:
- Connect your iPhone to your PC > launch iTunes
- Once your PC recognizes your device, click on the name of your device
- Go to the “Summary” tab
- Click “Back Up Now” to transfer the data to your iTunes
- After your iPhone’s data has been backed up on your iTunes, connect your iPad to your computer and repeat steps 1 to 3
- To transfer your iPhone’s backup to your iPad, click “Restore Backup”

- Select your latest backup (created in Step 4) > click “Restore”
Method #2: Wireless transfer via iTunes
If you don’t have a cable to connect your iPhone or iPad to your computer, you can back up the data wirelessly through WiFi.
You first need to activate, on both your iPhone and iPad, the option that allows your device to exchange files over WiFi. Here’s how:
- Connect your iPhone/iPad to your PC > click on the device icon on your computer
- Go to the “Summary” tab
- Select “Sync with this [device name] over WiFi”
- Click “Apply” > “Done”
When enabled, follow these steps (on both devices) to transfer your data wirelessly:
- Go to “General” > “iTunes WiFi Sync”
- Tap “Sync Now”
All your iPhone data that has been backed up with your iTunes will start to sync with your iPad. Wireless syncing often takes a fair bit of time, depending on the speed and stability of your internet connection.
Method #3: Third-party app
Many third-party apps, like MobileTrans, allow you to transfer your iPhone’s data to your iPad using a previously-made backup, without worrying about storage limits
To install and back up your iPhone to your iPad using MobileTrans, follow these steps:
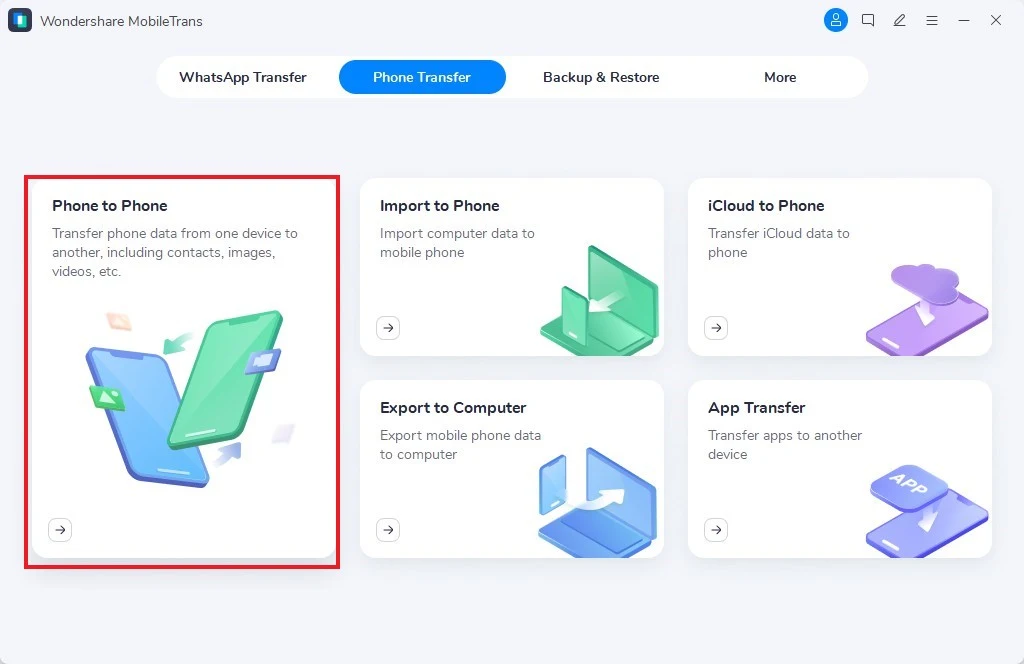
- Install MobileTrans on your PC or Mac > launch the app
- Connect your iPhone and iPad to your PC at the same time via lightning cables
- In MobileTrans, go to the “Phone Transfer” tab > click “Phone to Phone”

- If you’re transferring data from an iPhone to an iPad, ensure that your iPhone is on the left side of the screen as the “Source” and your iPad is on the right as the “Destination”. If they aren’t, click “Flip”
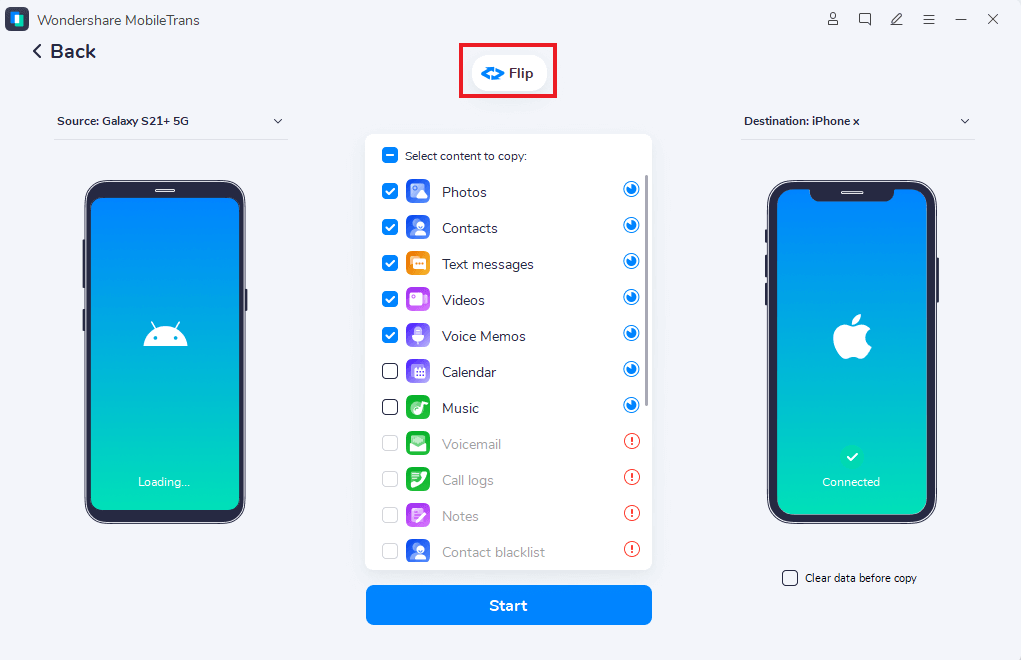
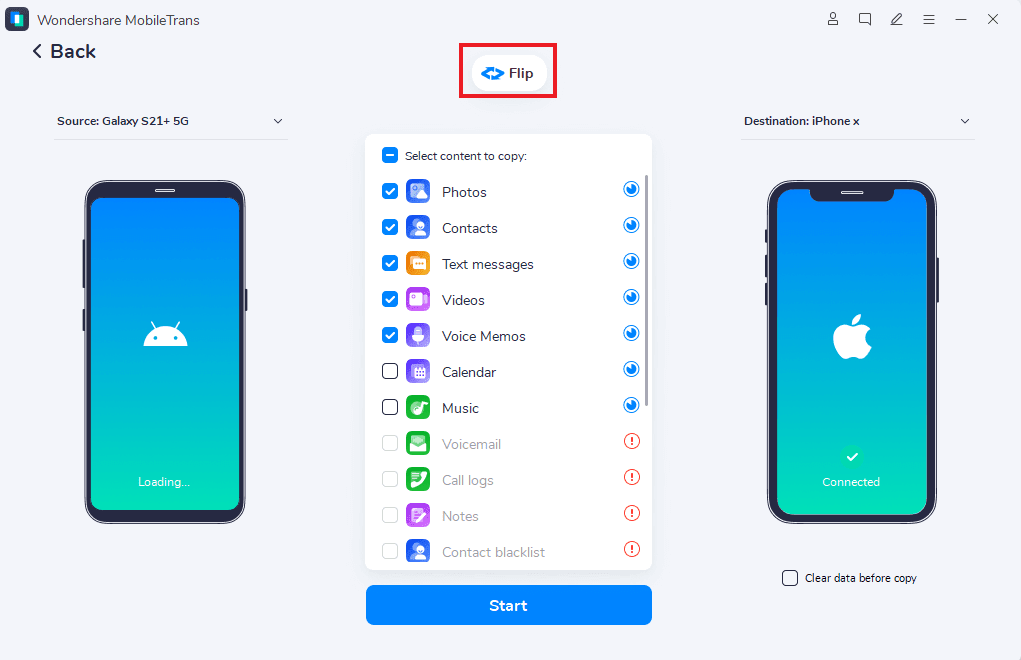
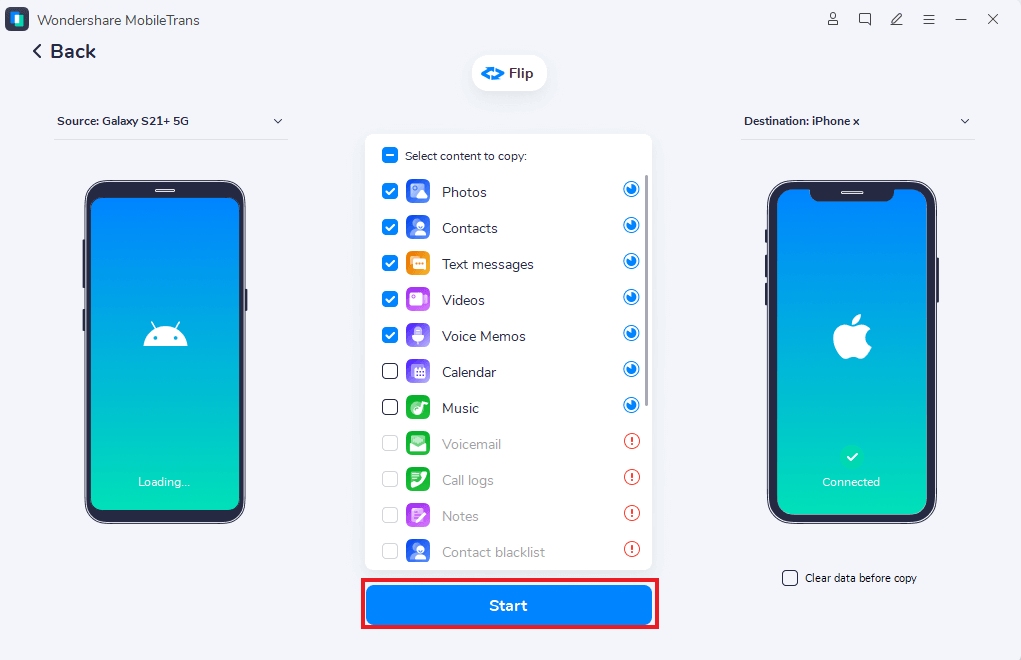
- Once the Apple devices are set, choose the file types you want to transfer across
- Click “Start” to begin the process
- process


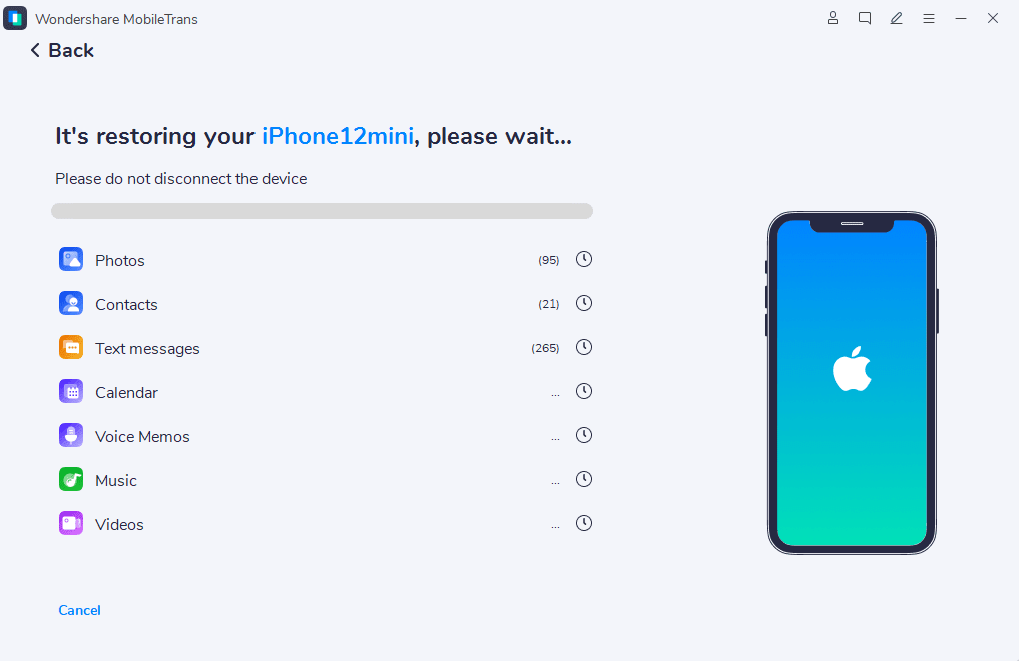
When the transfer process is complete, you’ll be prompted with a message notifying you the files have transferred successfully. You can safely remove both your iPhone and iPad from your PC or Mac.
Is it possible to restore an old iPhone backup to an iPad?

If you try to restore an iPhone backup that has an iOS version higher than your iPad’s, you’ll be prompted with a message indicating that the backup is not compatible with the device that is being restored.
On the other hand, if your iPhone backup iOS is older or the same as your iPad, you can restore your old iPhone backup through iCloud or iTunes .
Method #1: Through iCloud
If you’ve made an iCloud backup of your old iPhone, you can only restore it to your iPad if the iPad is brand new and not yet set up.
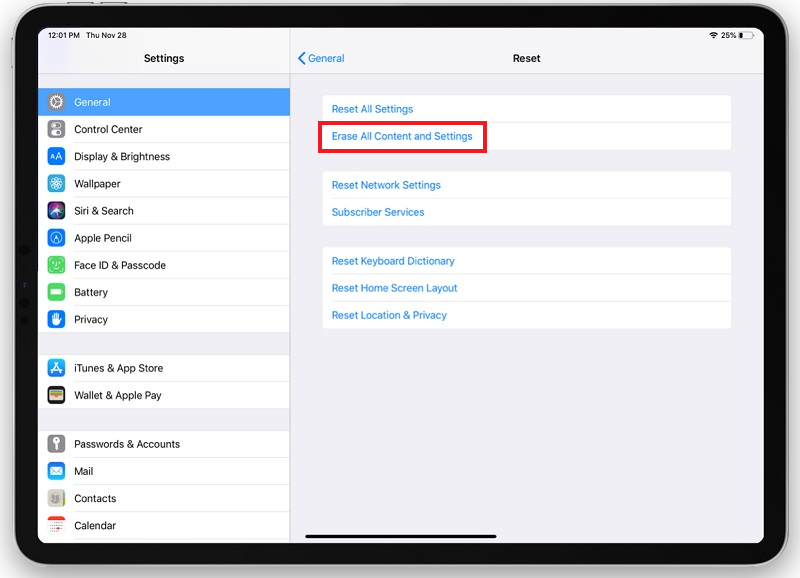
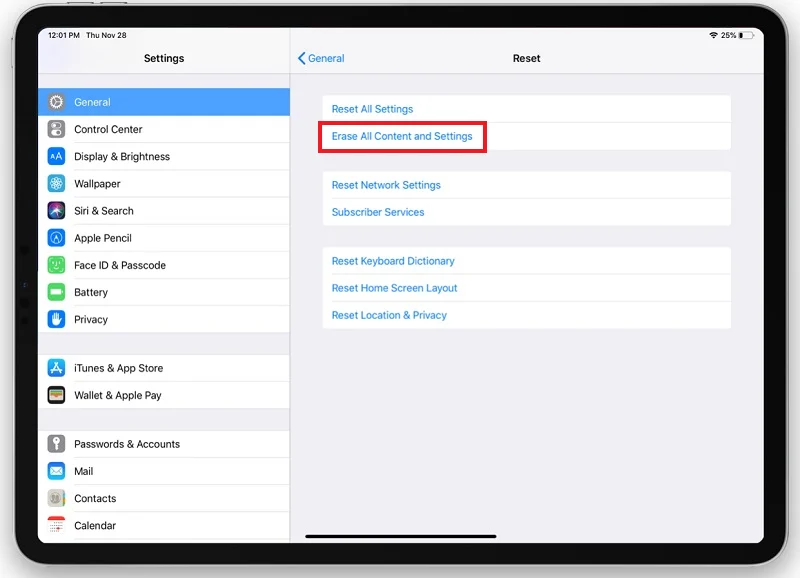
If you’ve already done the setup procedure on your iPad, you’ll need to factory reset it first. Here’s how:
Go to “Settings” > “General” > and tap on “Erase All Content and Settings”
Once the factory reset is complete, start setting up your iPhone again:
- Turn your iPad on, and you’ll see the “Hello” Screen
- Follow the instructions until you reach the “Apps & Data Screen”
- Choose “Restore from iCloud Backup” and sign into your old iPhone’s Apple ID
- Keep your phone connected to WiFi and wait for the process to complete
Once the setup is completed, the iCloud backup on your iPhone will be synced with your iPad.
If you’ve made an iCloud backup of your old iPhone, you can only restore it to your iPad if the iPad is brand new and not yet set up.
If you’ve already done the setup procedure on your iPad, you’ll need to factory reset it first. Once it’s done:
- Turn your iPad on, and you’ll see the “Hello” Screen
- Follow the instructions until you reach the “Apps & Data Screen”
- Choose “Restore from iCloud Backup” and sign into your old iPhone’s Apple ID
- Keep your phone connected to WiFi and wait for the process to complete
Method #2: Through iTunes
Since iCloud offers only 5GB of free storage, you can use iTunes, free of charge, to back up your iPhone’s data and avoid purchasing additional storage from iCloud.
If you’ve used iTunes to back up your iPhone files, you can transfer them to your iPad by following these steps:
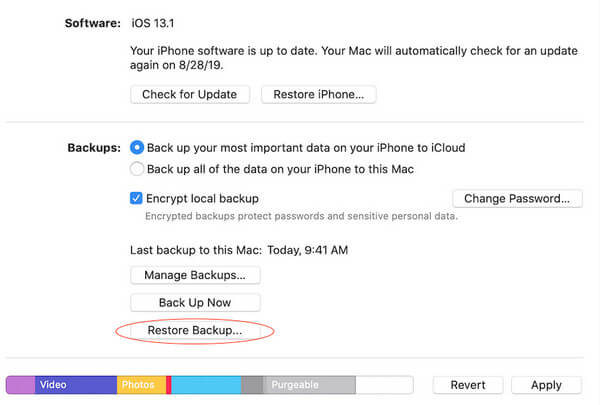
- Connect your iPad to your PC > launch iTunes
- When your iPhone icon appears, select it > click “Restore Backup”

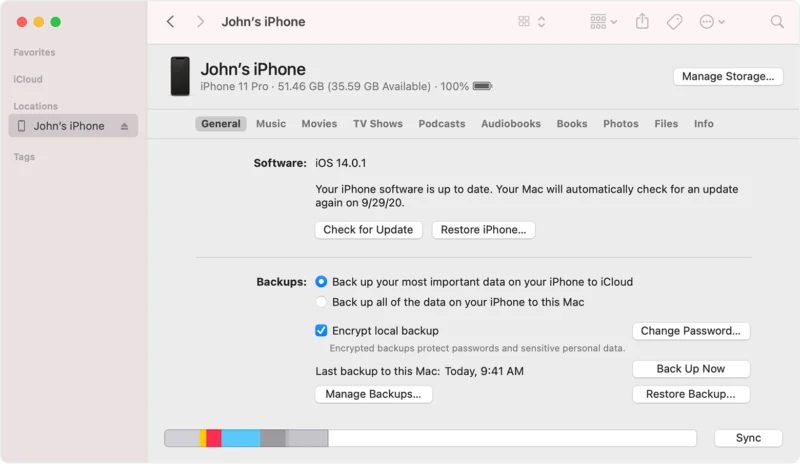
- Select the relevant backup > click “Restore”
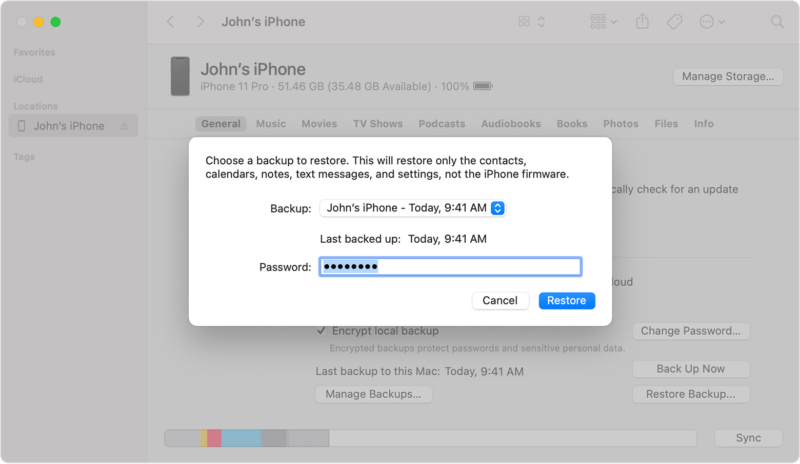

Image source: Apple
How do you transfer pictures from an iPhone to an iPad?
Apple allows you to conveniently transfer your pictures across your Apple devices.
To transfer your pictures from your iPhone to your iPad, you can use iCloud, iTunes or AirDrop.
Method #1: Through iCloud
With iCloud enabled, you can automatically sync your iPhone with your iPad and transfer your pictures seamlessly.
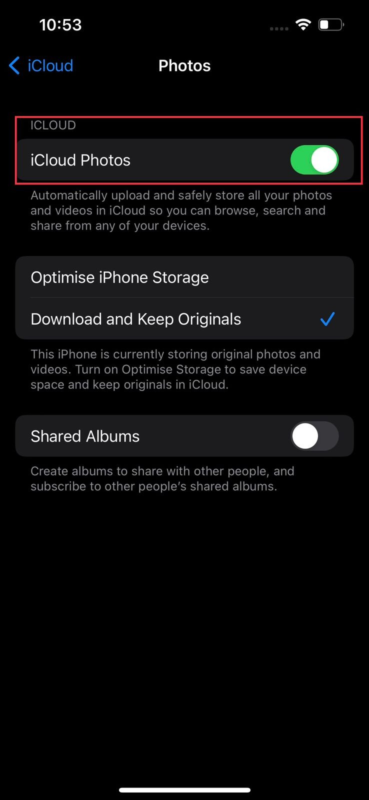
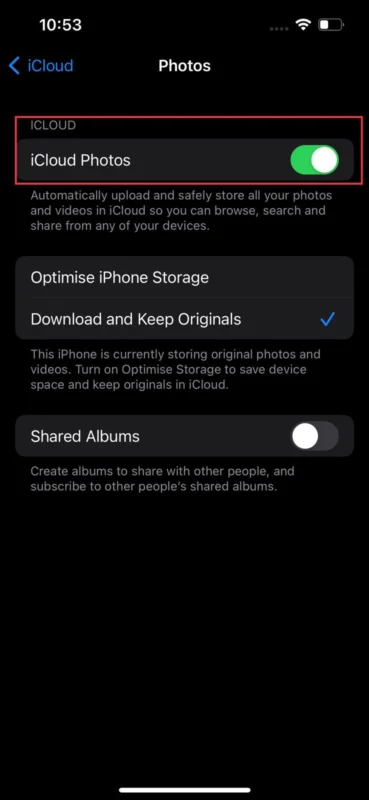
Both your devices need to be logged in with the same iCloud account and should have the “iCloud Photos” option enabled. Here’s how:
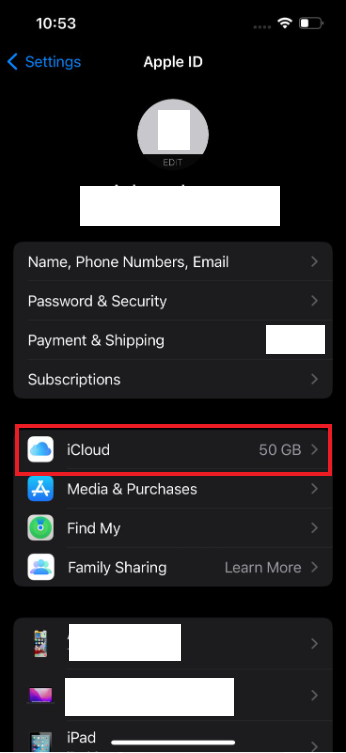
- On your iPhone, go to “Settings” > [Device Name] > iCloud

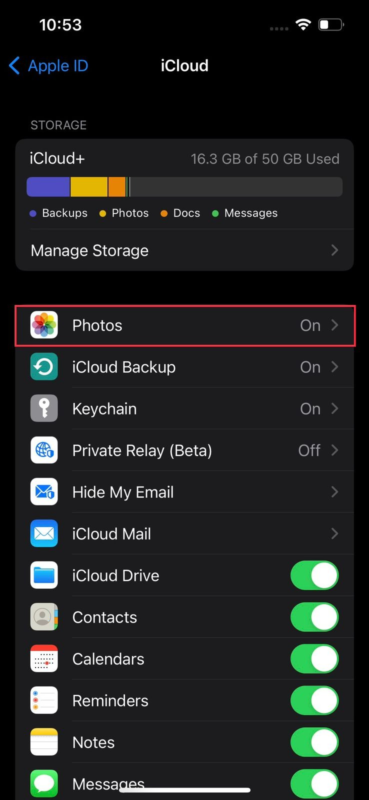
- Tap “Photos” > toggle on “iCloud Photos”

- On your iPad, log in with the same iCloud ID as your iPhone
- Repeat steps 1 and 2 on your iPad
Your iPhone’s iCloud photos will sync with your iPad photos, and you can view them in the Photos app.
Method #2: Through iTunes
iTunes allows you to back up all your photos using your PC and Macbook, and transfer them to your iPad.
If you’re using a Mac with OS Catalina or higher, you’ll need to use your “Finder” to back up your pictures instead of iTunes.
If you have OS Mojave or any other earlier version of the Mac OS, follow the steps below to transfer your iPhone photos to your iPad:
- Connect your iPhone to your computer > open iTunes


- Click on your iPhone > “Photos” > “Sync Photos > “Apply”

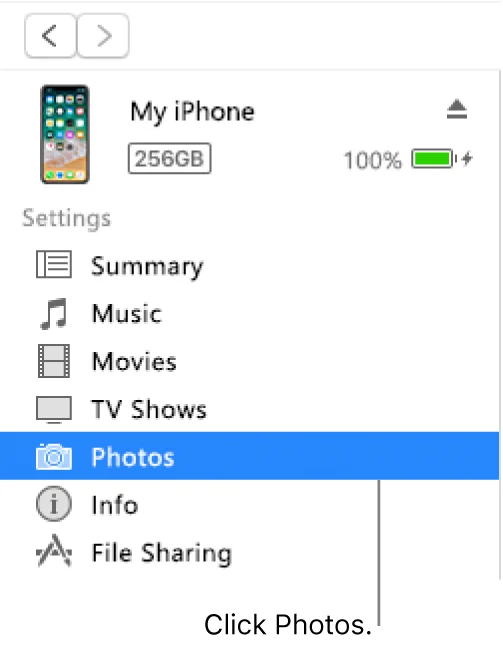
Image Source: Apple
This will sync all your iPhone photos with your iTunes account.
Next, plug in your iPad and follow the next steps:
- Open iTunes > click on your iPad
- Go to “Photos” > enable “Sync Photos” > “Apply”
Method #3: Through AirDrop
AirDrop is another easy-to-use Apple service that allows you to transfer pictures to other iDevices by simply tapping the share button.
This feature is particularly useful if you’re looking to share selected photos rather than a whole album.
Before you start sharing pictures across your iOS devices, you need to enable AirDrop on both of them. Here’s how:
- Go to “Settings” > “General” > “AirDrop”

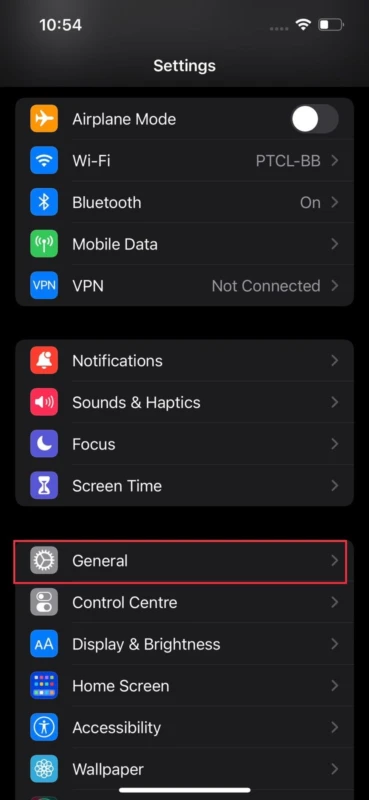
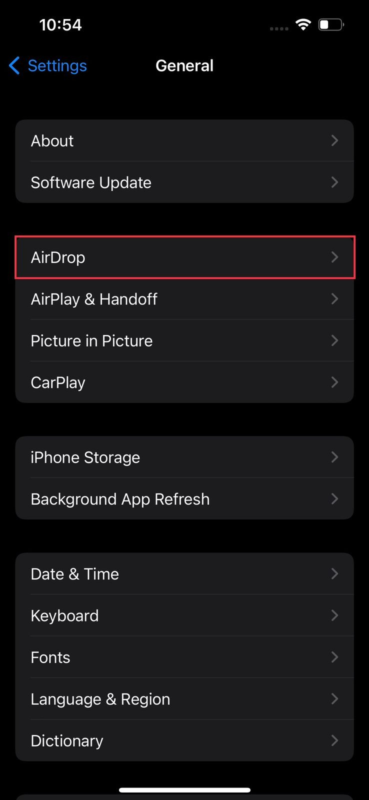

- Select “Everyone”


When AirDrop is enabled on both your iPhone and iPad, here’s how you can transfer pictures from your iPhone to your iPad:
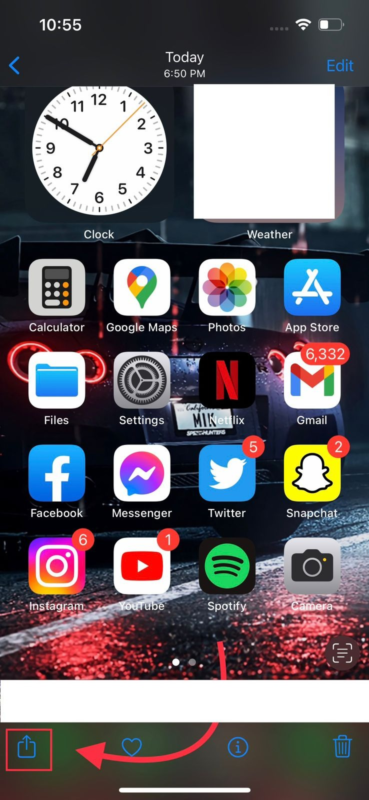
- Go to the “Photos” app on your iPhone > select the picture(s) you want to transfer
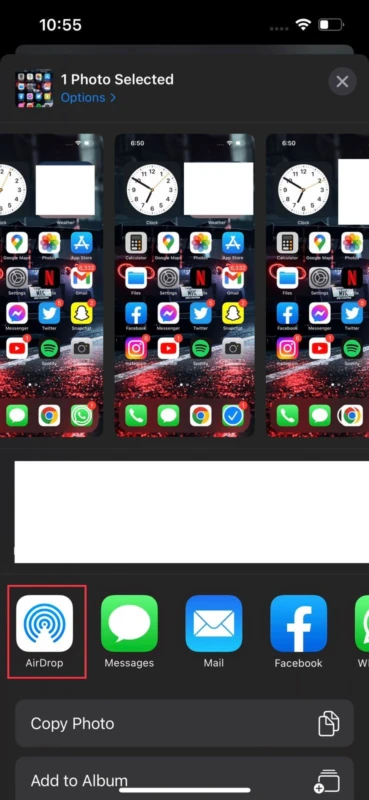
- On the preview screen, tap on the share icon

- Select “AirDrop” > choose your iPad from the list

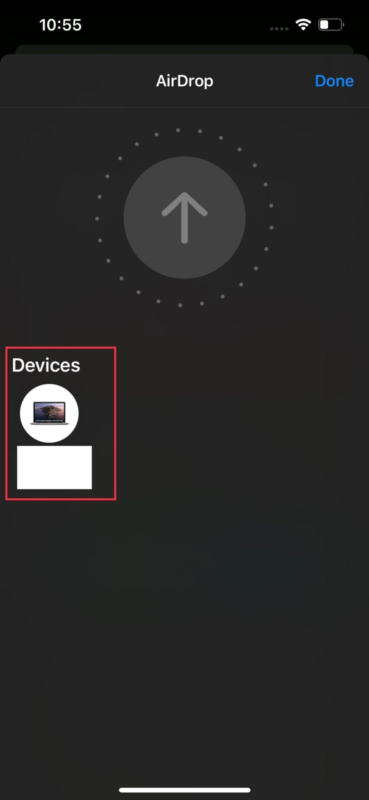
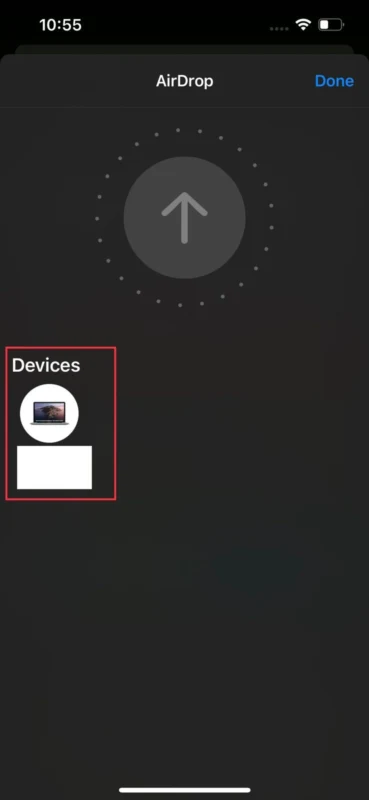
Your iPad will receive an alert to accept or decline the incoming AirDrop. Accept it and the photo will automatically appear in your Photos app.
How do I transfer music from an iPhone to an iPad?
You can use iTunes to transfer your music collection from your iPhone to your iPad. However, Apple won’t let you move songs you’ve downloaded from the internet (without purchasing them from the iTunes Store) to your iPad.
For purchased music
If you purchased your music officially from the iTunes Store, you don’t need to use any third-party app to transfer your favorite songs to your iPad. You can do this by simply running iTunes on your computer. Here’s how:
- Plug your phone into your PC > open iTunes
- Click “File” > “Devices” > “Transfer Purchases from [device name]”
Now unplug your iPhone from your computer and plug in your iPad
- Click “Songs” > select the music files you want to transfer onto your iPad
- Right-click the selected files > choose “Add to Device”
- Select your iPad as the device to move the music files to and the selected songs will be transferred to the iPad
For non-purchased music
Apple makes it very hard to move non-purchased songs to other Apple devices due to copyright considerations.
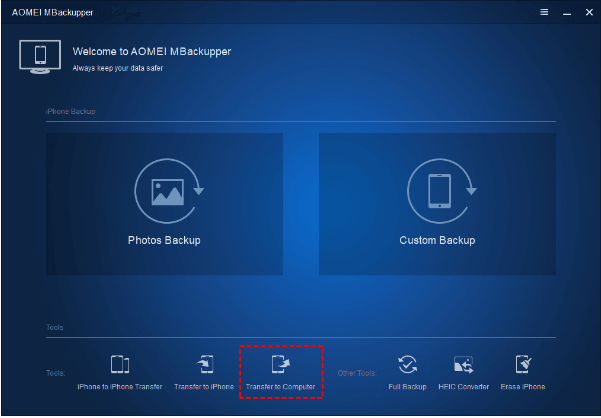
You need to use a third-party application, like AOMEI MBackupper, to transfer those non-purchased songs. To Install and use AOMEI MBackupper:
- Install and launch AOMEI MBackupper on your PC
- Connect your iPhone to your PC via USB cable > click “Transfer to Computer”

- Select the non-purchased (or purchased) songs you want to move to your iPad > click “OK”
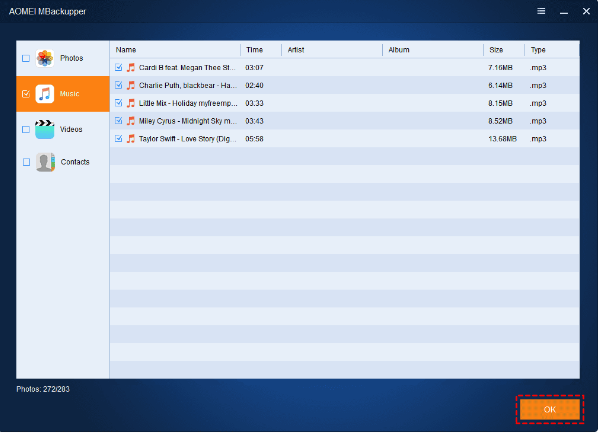

- Choose the storage path to save your music > click “Transfer”
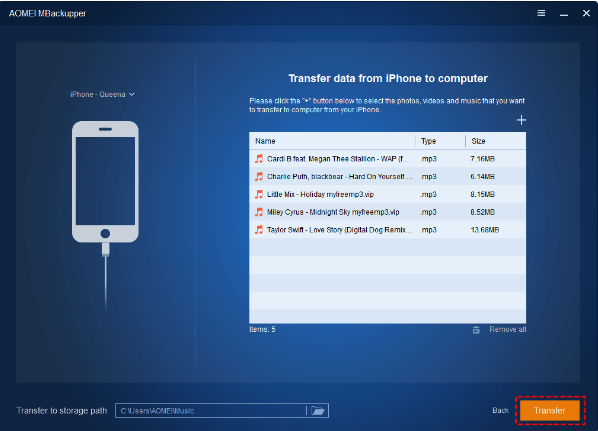
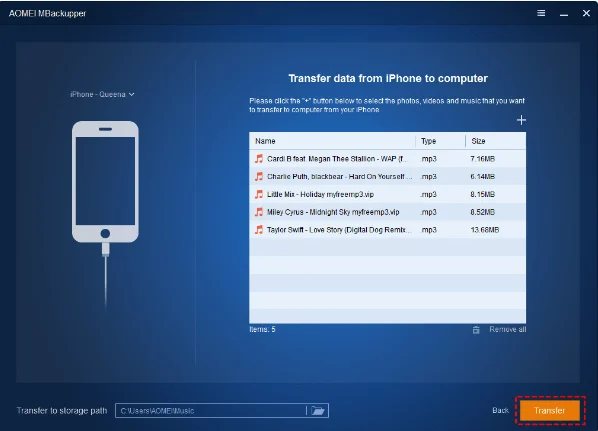
Now unplug your iPhone from your computer and plug in your iPad
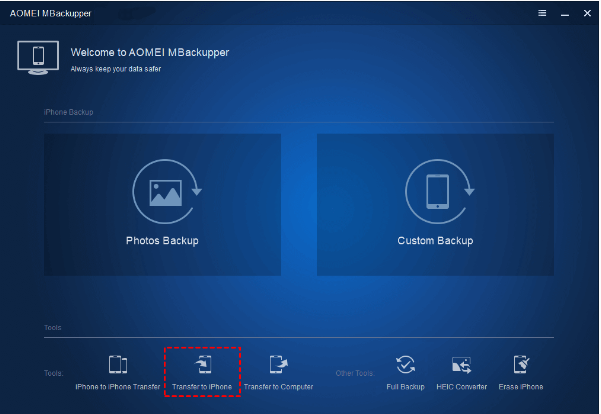
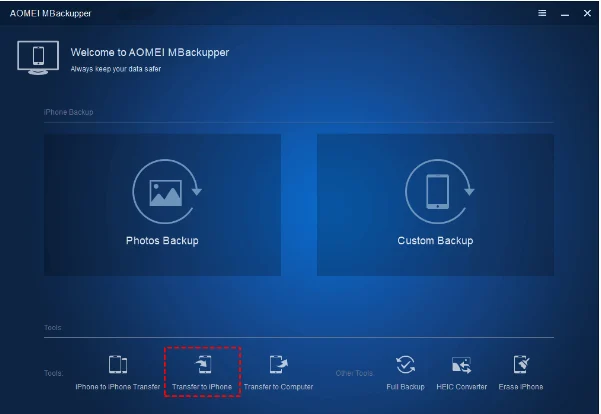
- Click “Transfer to Phone” prompted in the application
- Click on the “+” icon > choose the songs you want to transfer

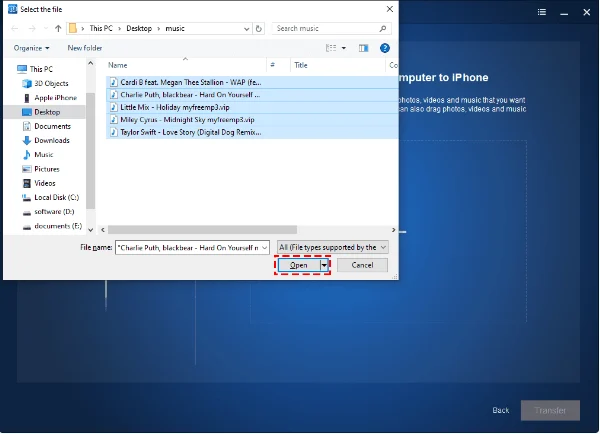
- Click “Transfer” to move all the selected songs to your iPad

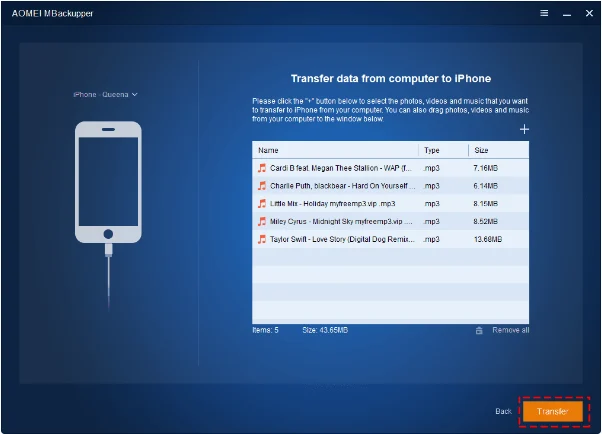
Image Source: Ubackup
How do you transfer apps from an iPhone to an iPad?
Apple’s iCloud service allows you to share iCloud-compatible applications across any Apple device that uses the same Apple ID.
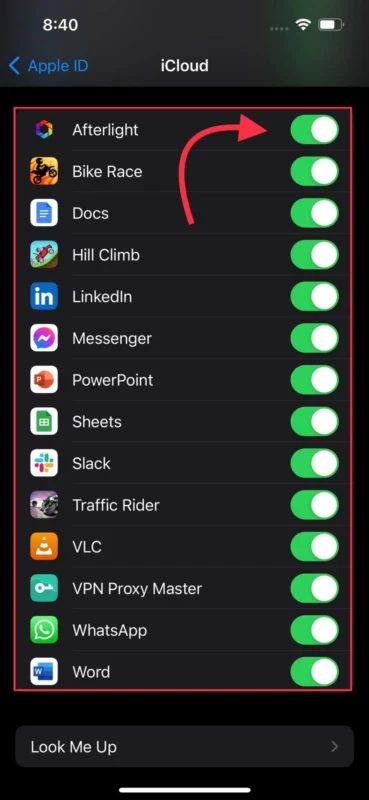
Before you begin sharing your applications, you need to make sure they’re synced with your iCloud account. Here’s how:
- Go to “Settings” > [Apple ID] > “iCloud”
- In the apps section, enable any application you want to sync with your iCloud

After the iCloud sync is enabled, you can either automatically download all your applications to your iPad or select those you need.
Automatic app download
Enabling the “Automatic Download” feature allows you to download and install all your iPhone applications automatically to your iPad. Here’s how:
- Open “Settings” > “App Store”
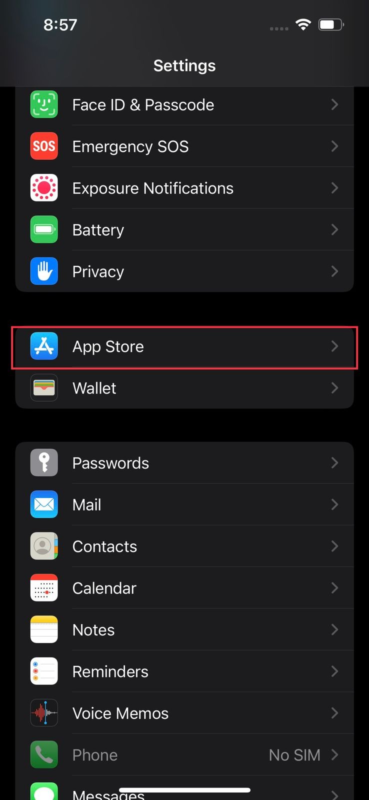

- Under the “Automatic Downloads” section, toggle on “Apps”
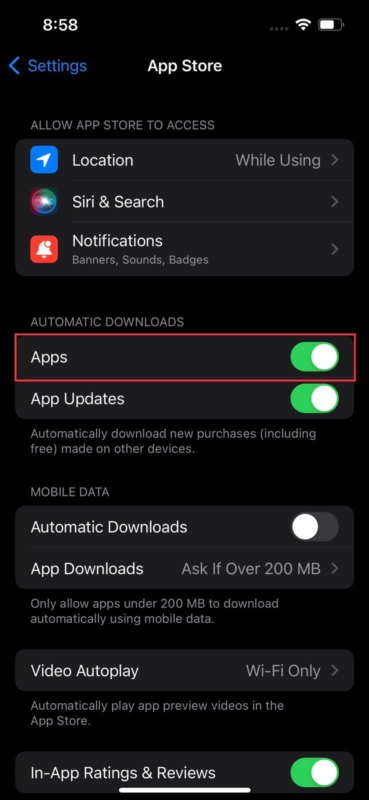

You can also enable the “App Updates” feature to keep all your synced applications up-to-date.
While this will download most of your iPhone applications, you won’t be able to get apps that aren’t compatible with iCloud sync.
Download selective apps
To selectively download your iPhone applications on your iPad, you can use the App Store method. This is especially useful when you’re low on iPad storage and don’t want to fill up your device with apps you don’t need.
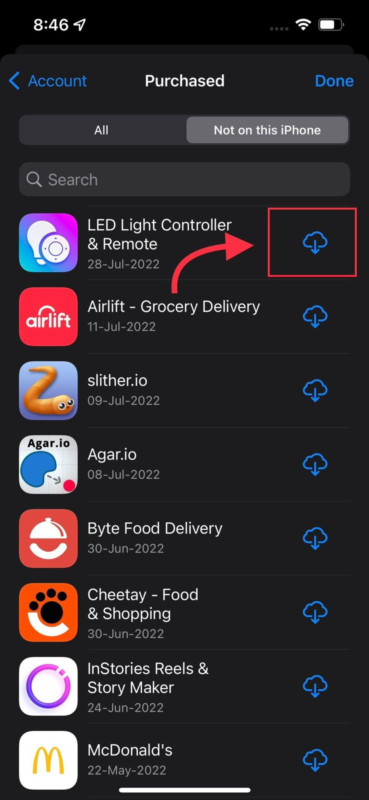
Go to the App Store and follow the steps below:
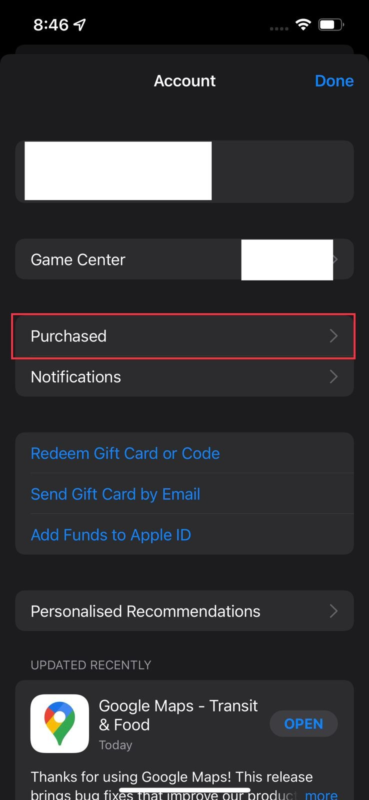
- Tap your account icon
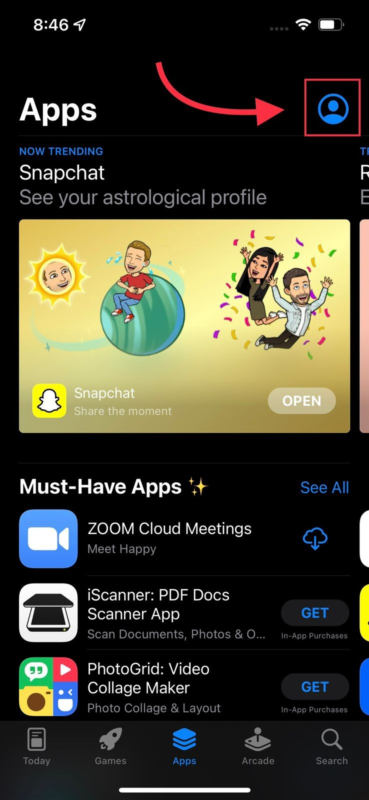

- Go to “Purchased” > “Not on this iPad”


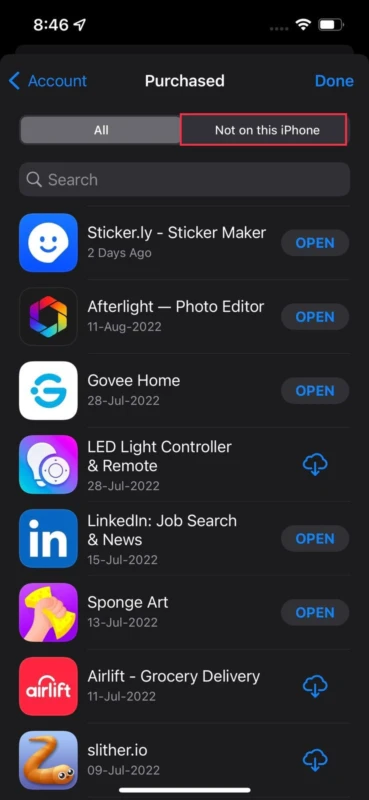
- Choose the app you want > tap on the cloud icon to download it